Bullion Knots - Learn This Modern Embroidery Technique
Introduction
Are you ready to learn a new stitch? I hope so!
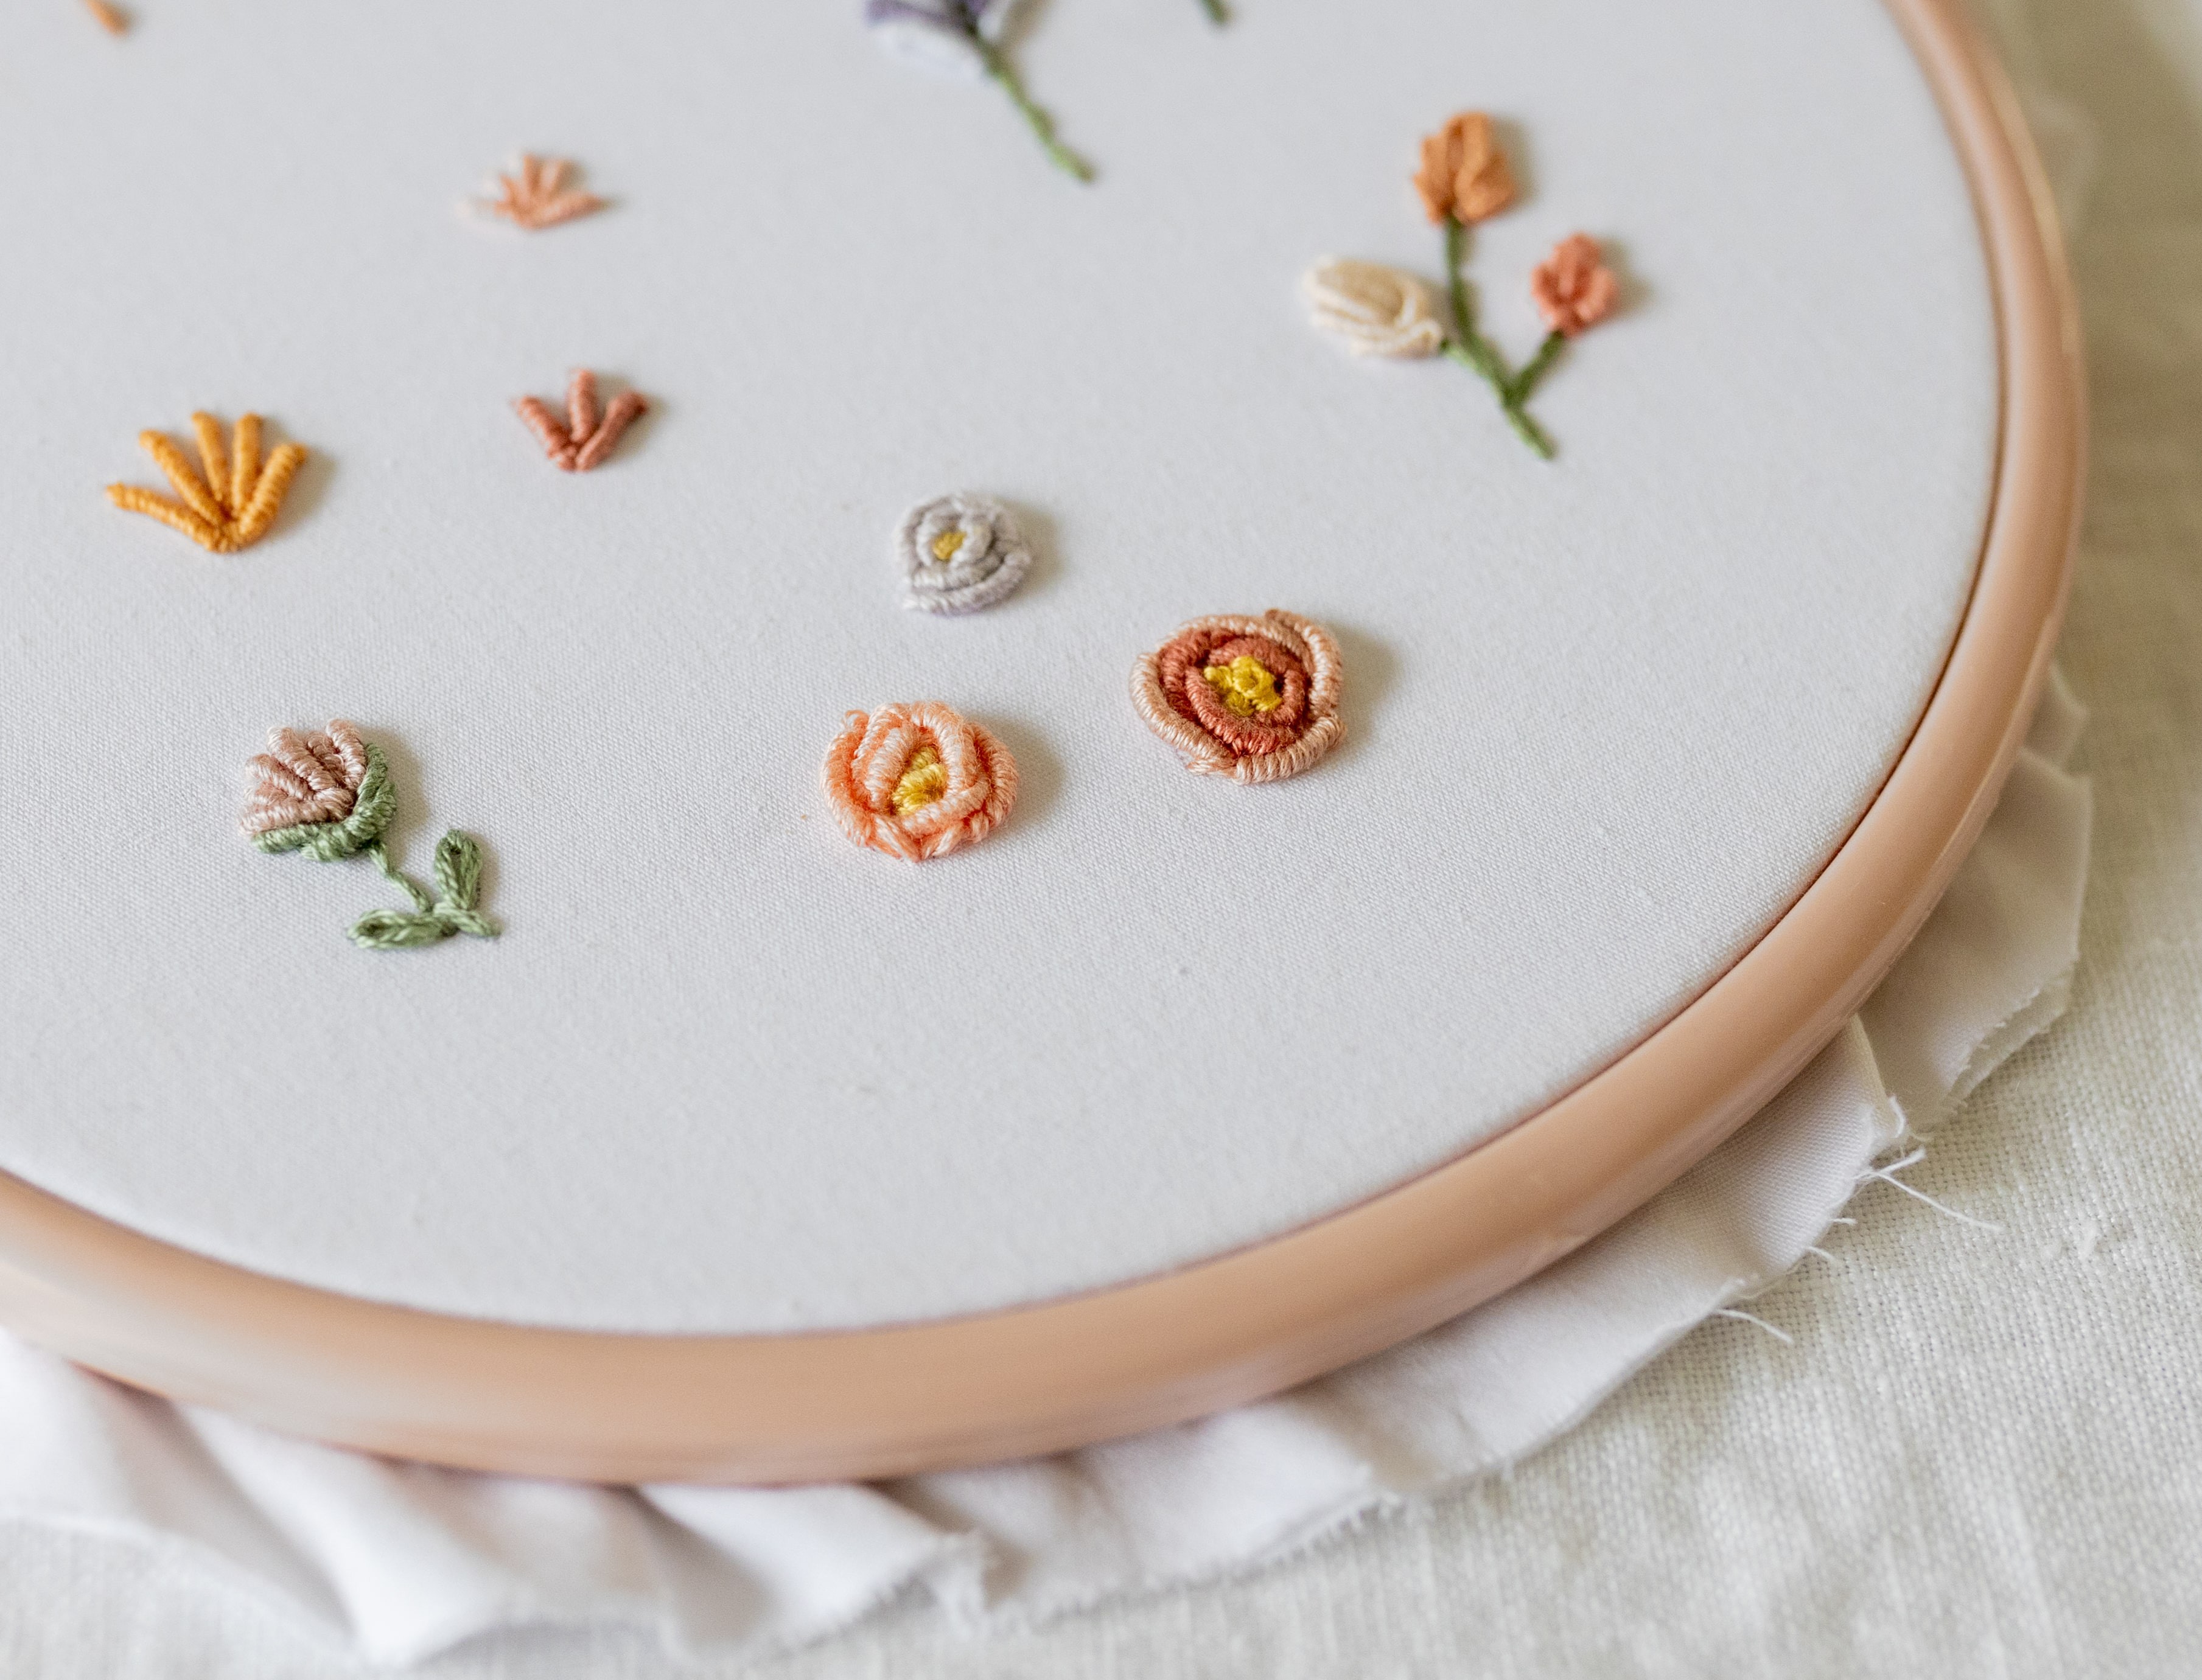
Because today we’re diving into the world of Bullion Knots! This is a beautiful embroidery technique that adds a whole bunch of texture and raised three-dimensional effects to your projects. It’s awesome for creating flowers and foliage.
I think of this technique as a sister technique to French Knots, because it also involves creating a knot by wrapping your thread around the needle – but this time it’s a much longer knot.
Now, before we get started, let me just say that the goal here is not perfection.
This is quite possibly one of the most challenging embroidery techniques that I teach. So don’t worry if you find them quite hard, and you make a lot of wonky or failed knots along the way! You definitely won’t be alone.
We’re not aiming to create the most flawless Bullion Knot in the world (although that would be pretty cool). We’re just here to have some fun and experiment with a new technique!
So don’t give up if you find them challenging - I know you’ll get there and be making your own Bullion Knots before long!
So grab your supplies, take a deep breath, and let’s get started!
Preparation
Before we start stitching, I want to cover a few quick points:
-
Tight fabric: Make sure that your fabric is nice and tight in your hoop – this helps a LOT.
-
What type of needle? The ideal needle for the job is a‘milliner needle’. This type of needle is long and thin throughout its length, which makes it easier to passthrough the tightly wrapped coils of the Bullion Knot (compared to a regular embroidery needle which gets wider around the eye of the needle). But to keep things simple, I use a normal embroidery needle, as shown in this tutorial.
-
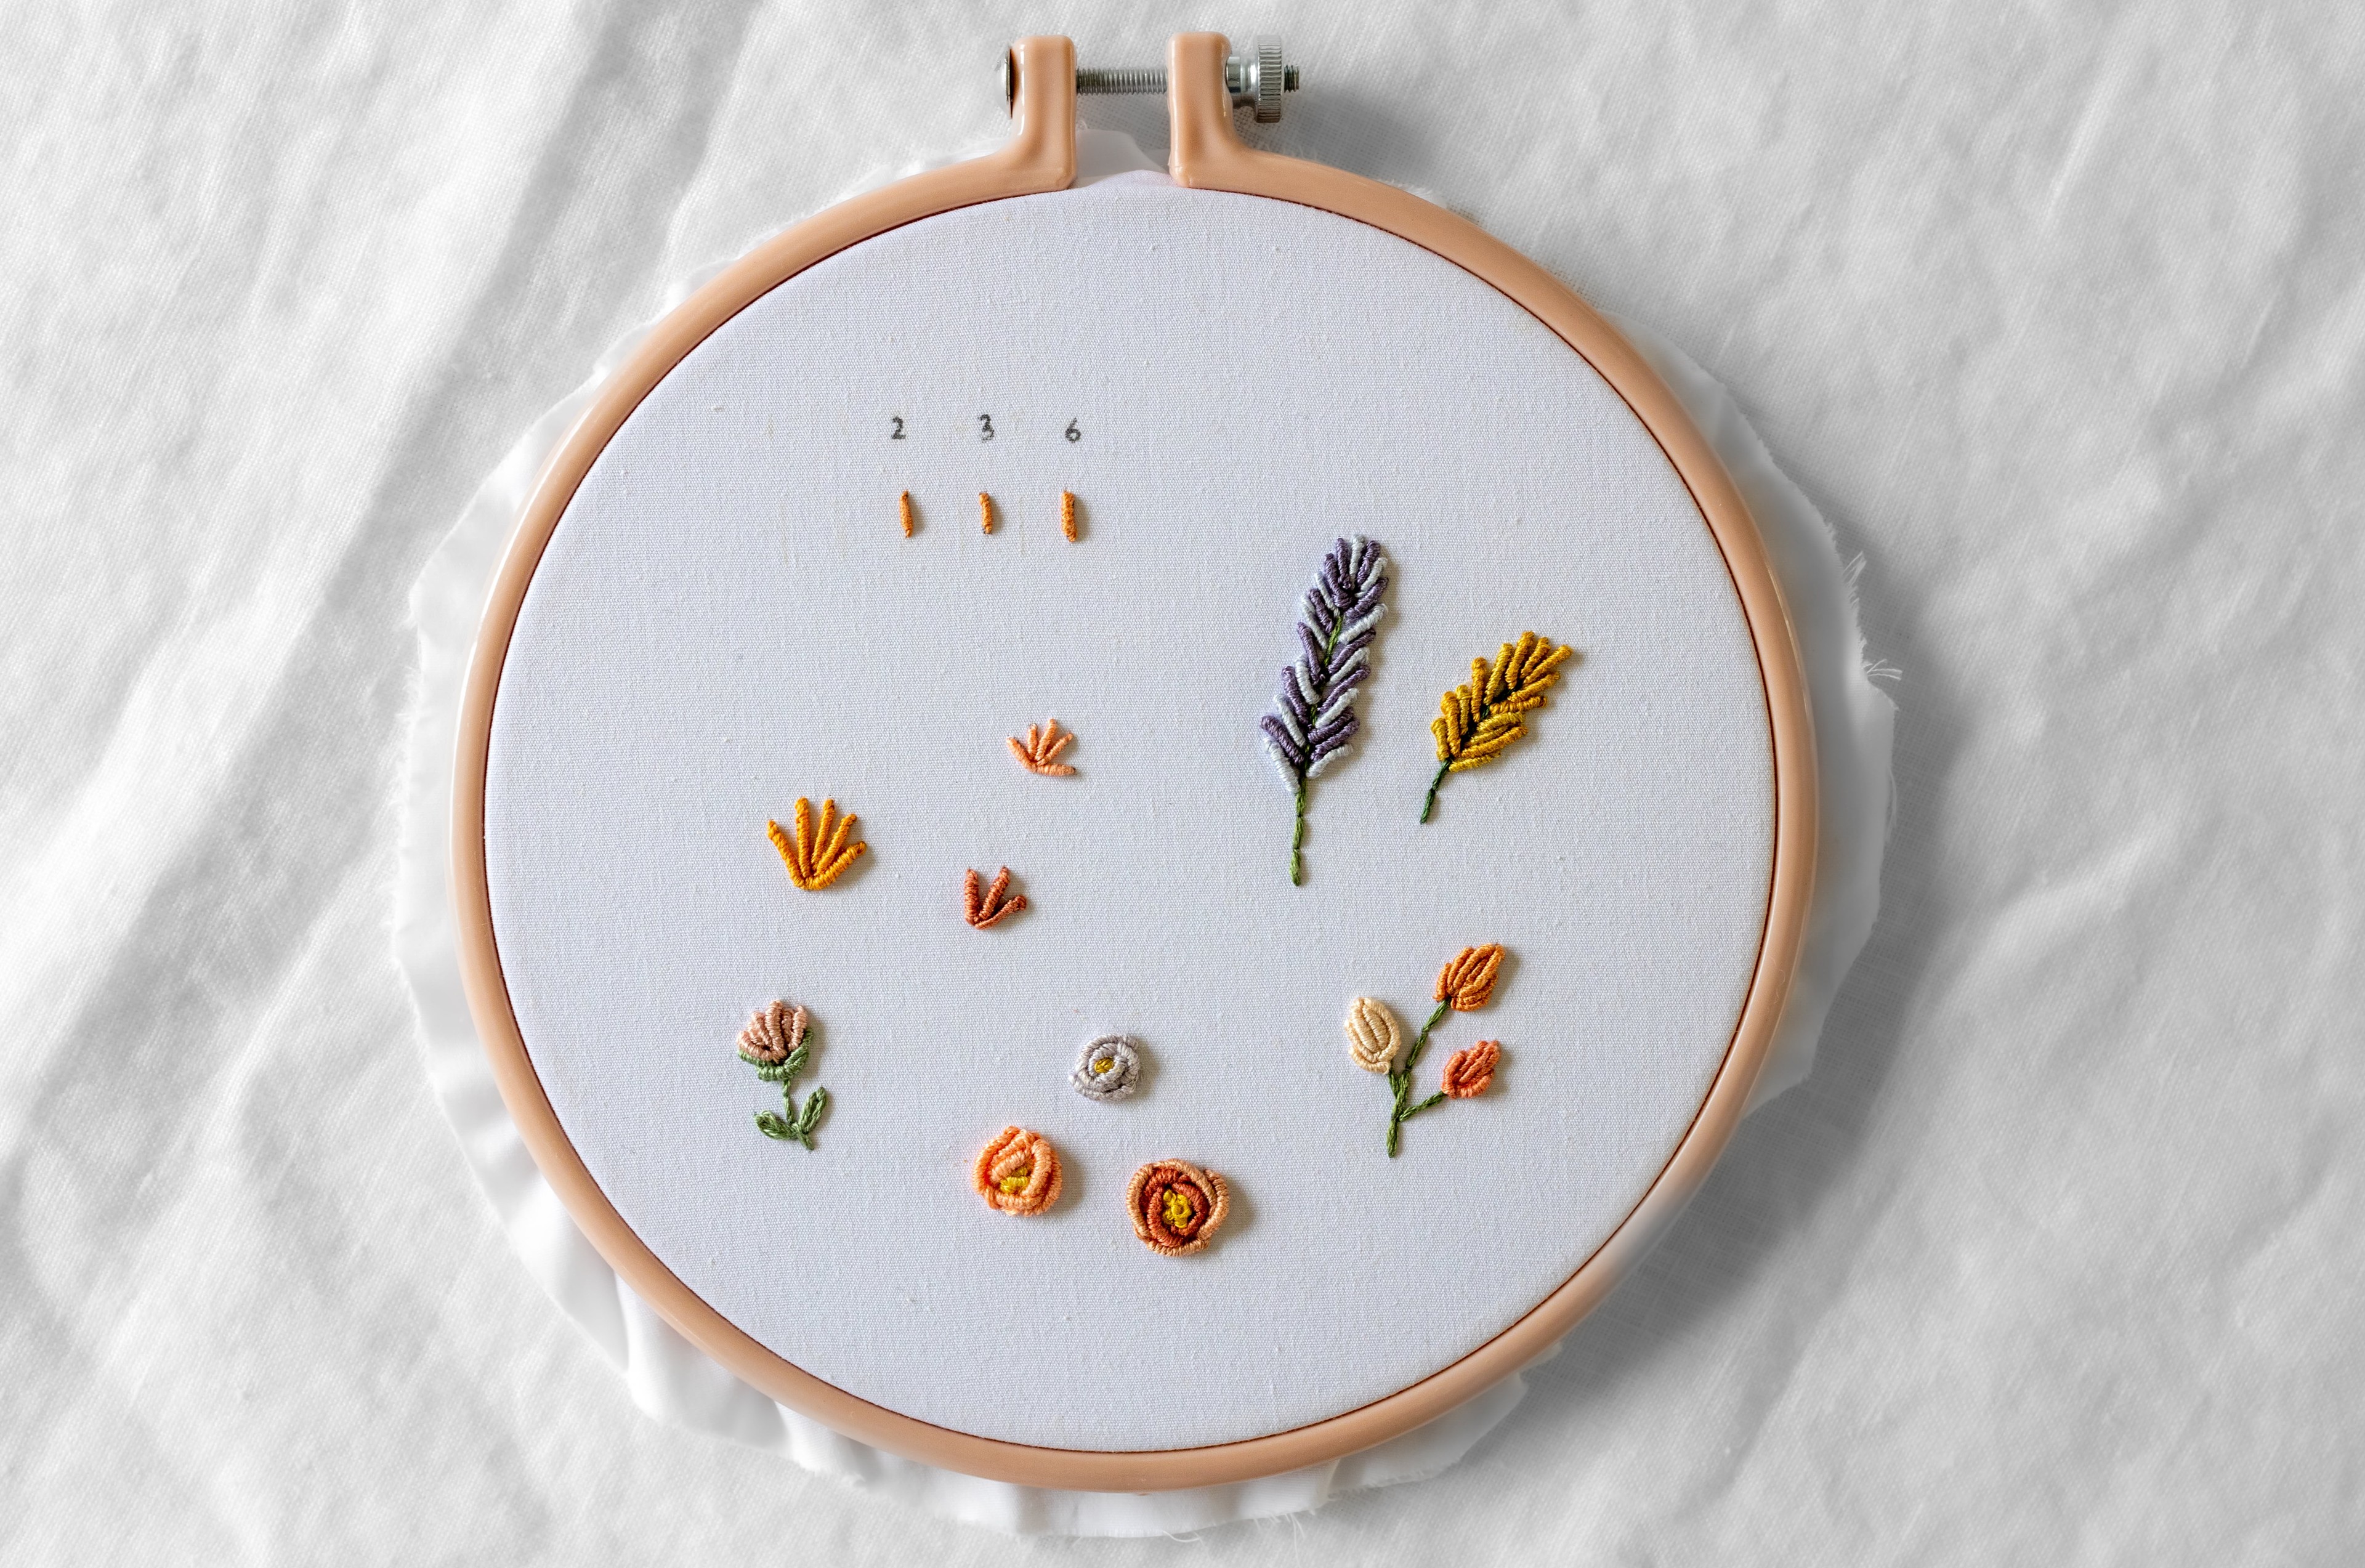
How much floss? The amount of floss used will affect how chunky or fine your Bullion Knots are. See the example here of knots made with 2, 3 and 6 strands –see how they get bigger with more floss?
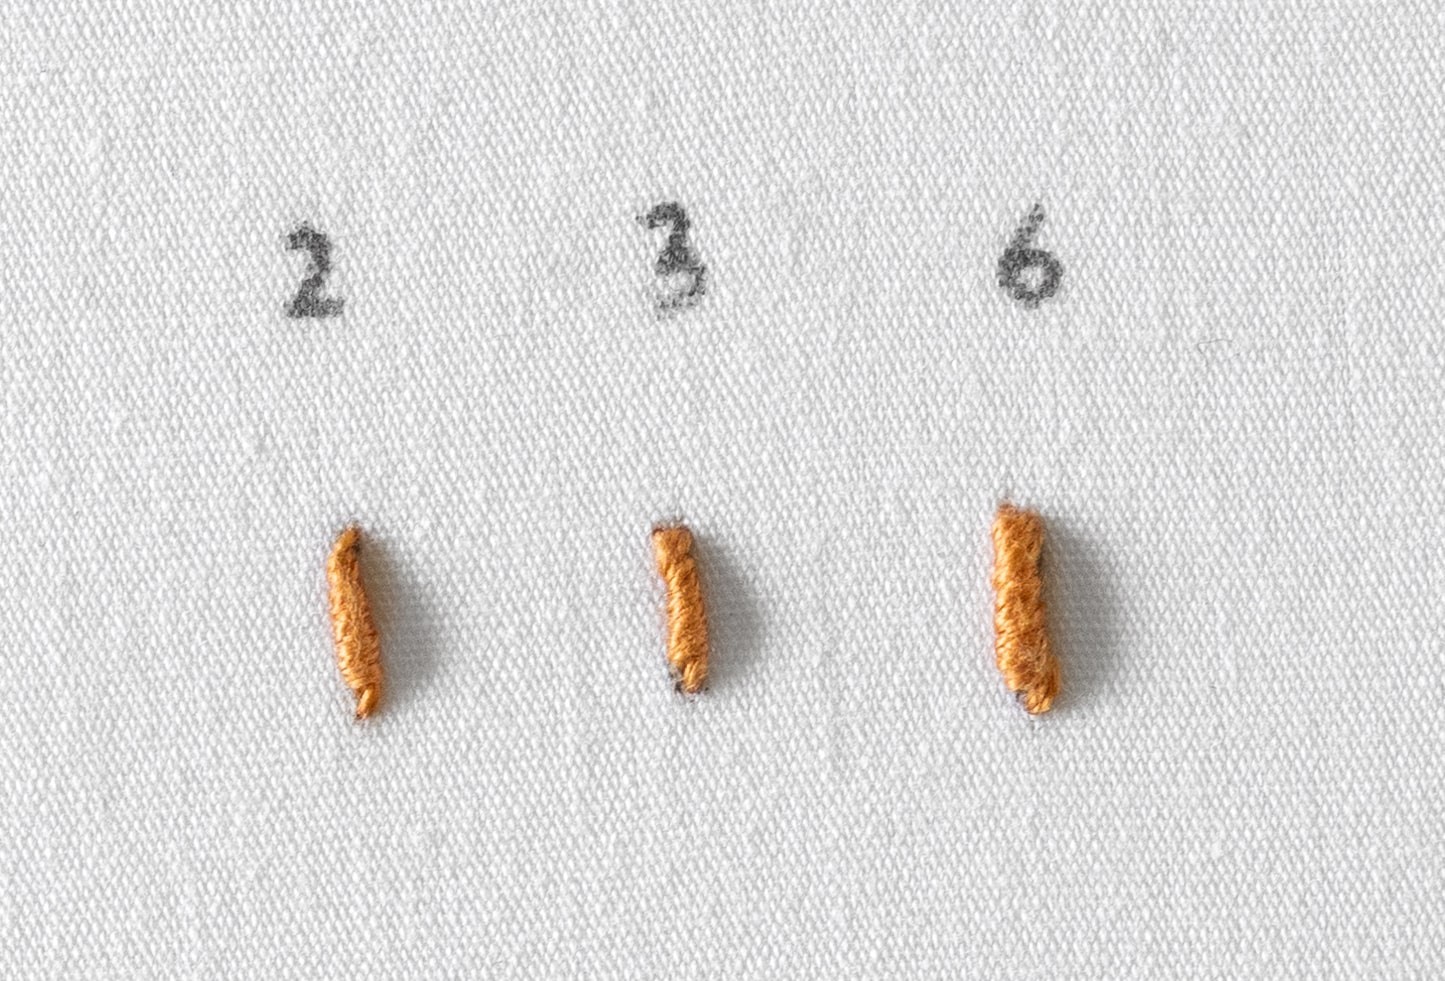
To get started with this tutorial, I recommend using 3 strands of floss, and working on a stitch length that’s about 1⁄4 inch long (about 6mm).
Step 1
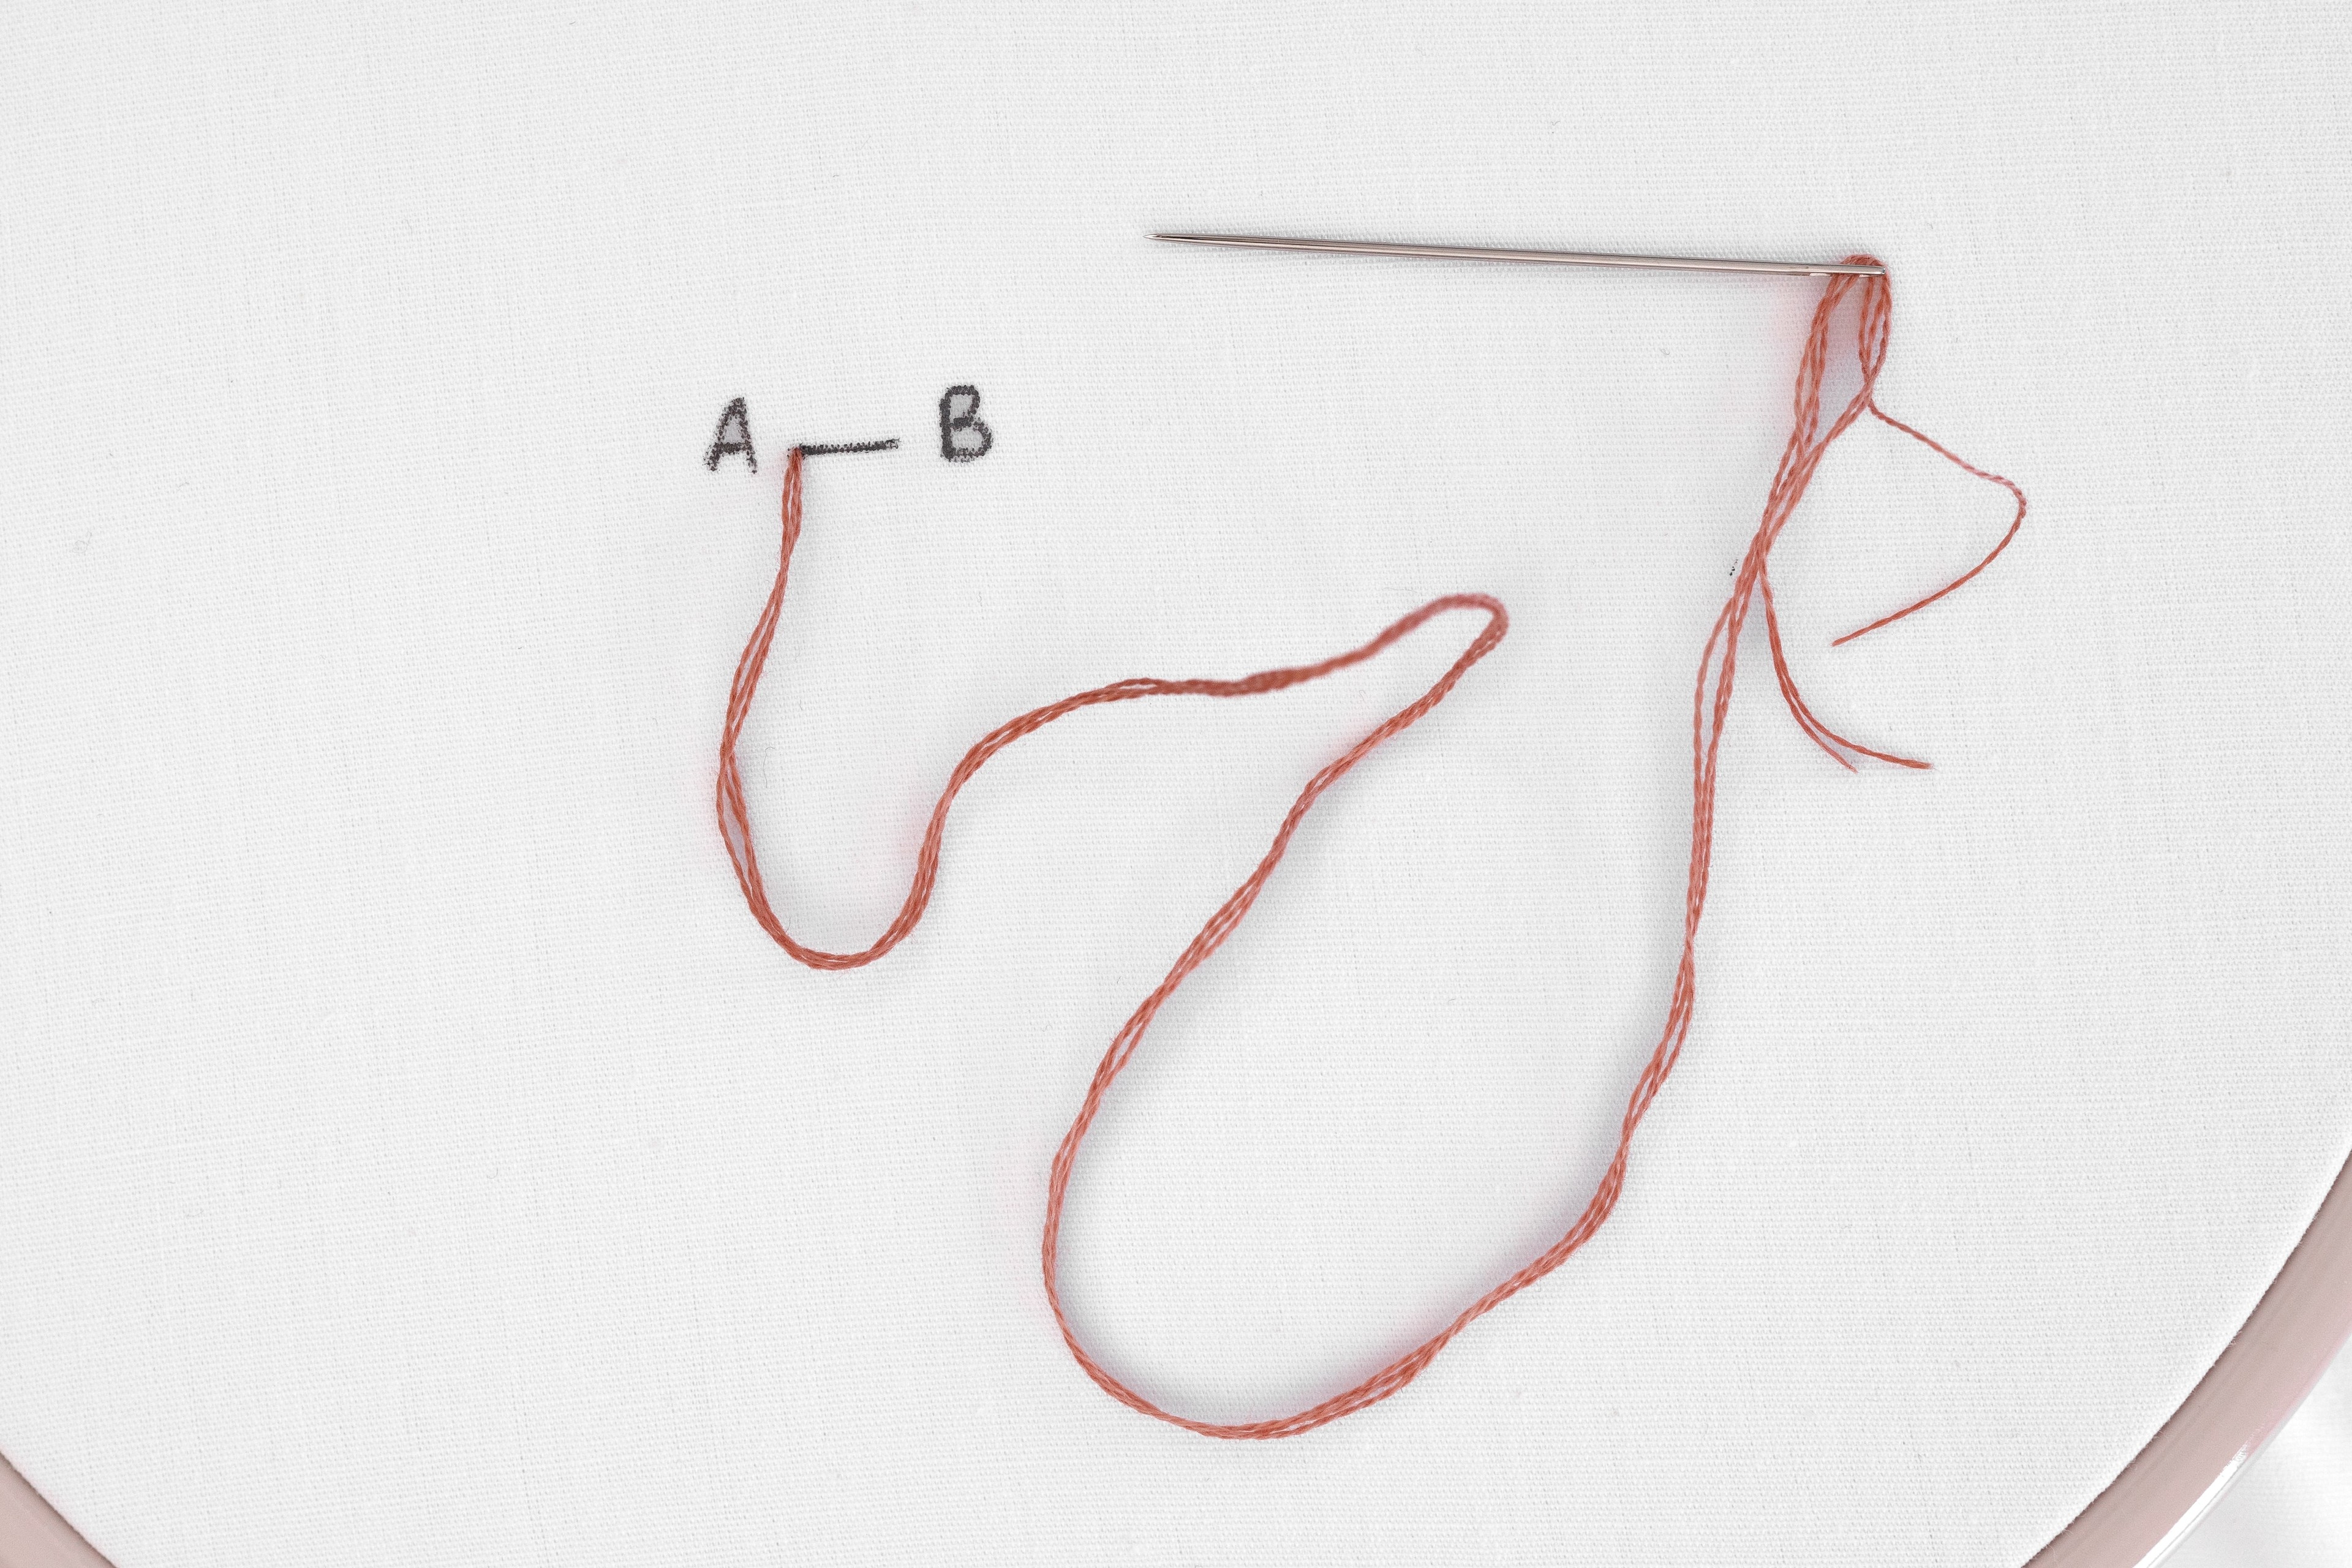
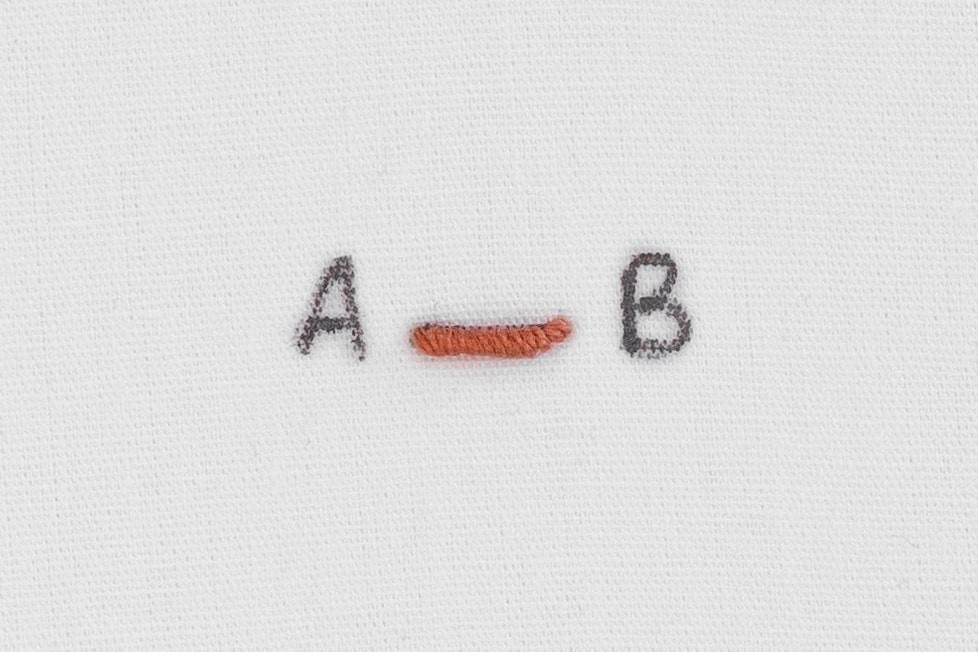
Bring your needle up at the start of the stitch (point A). Draw through all the slack, so that the thread is secured on the back with your knot.
Step 2
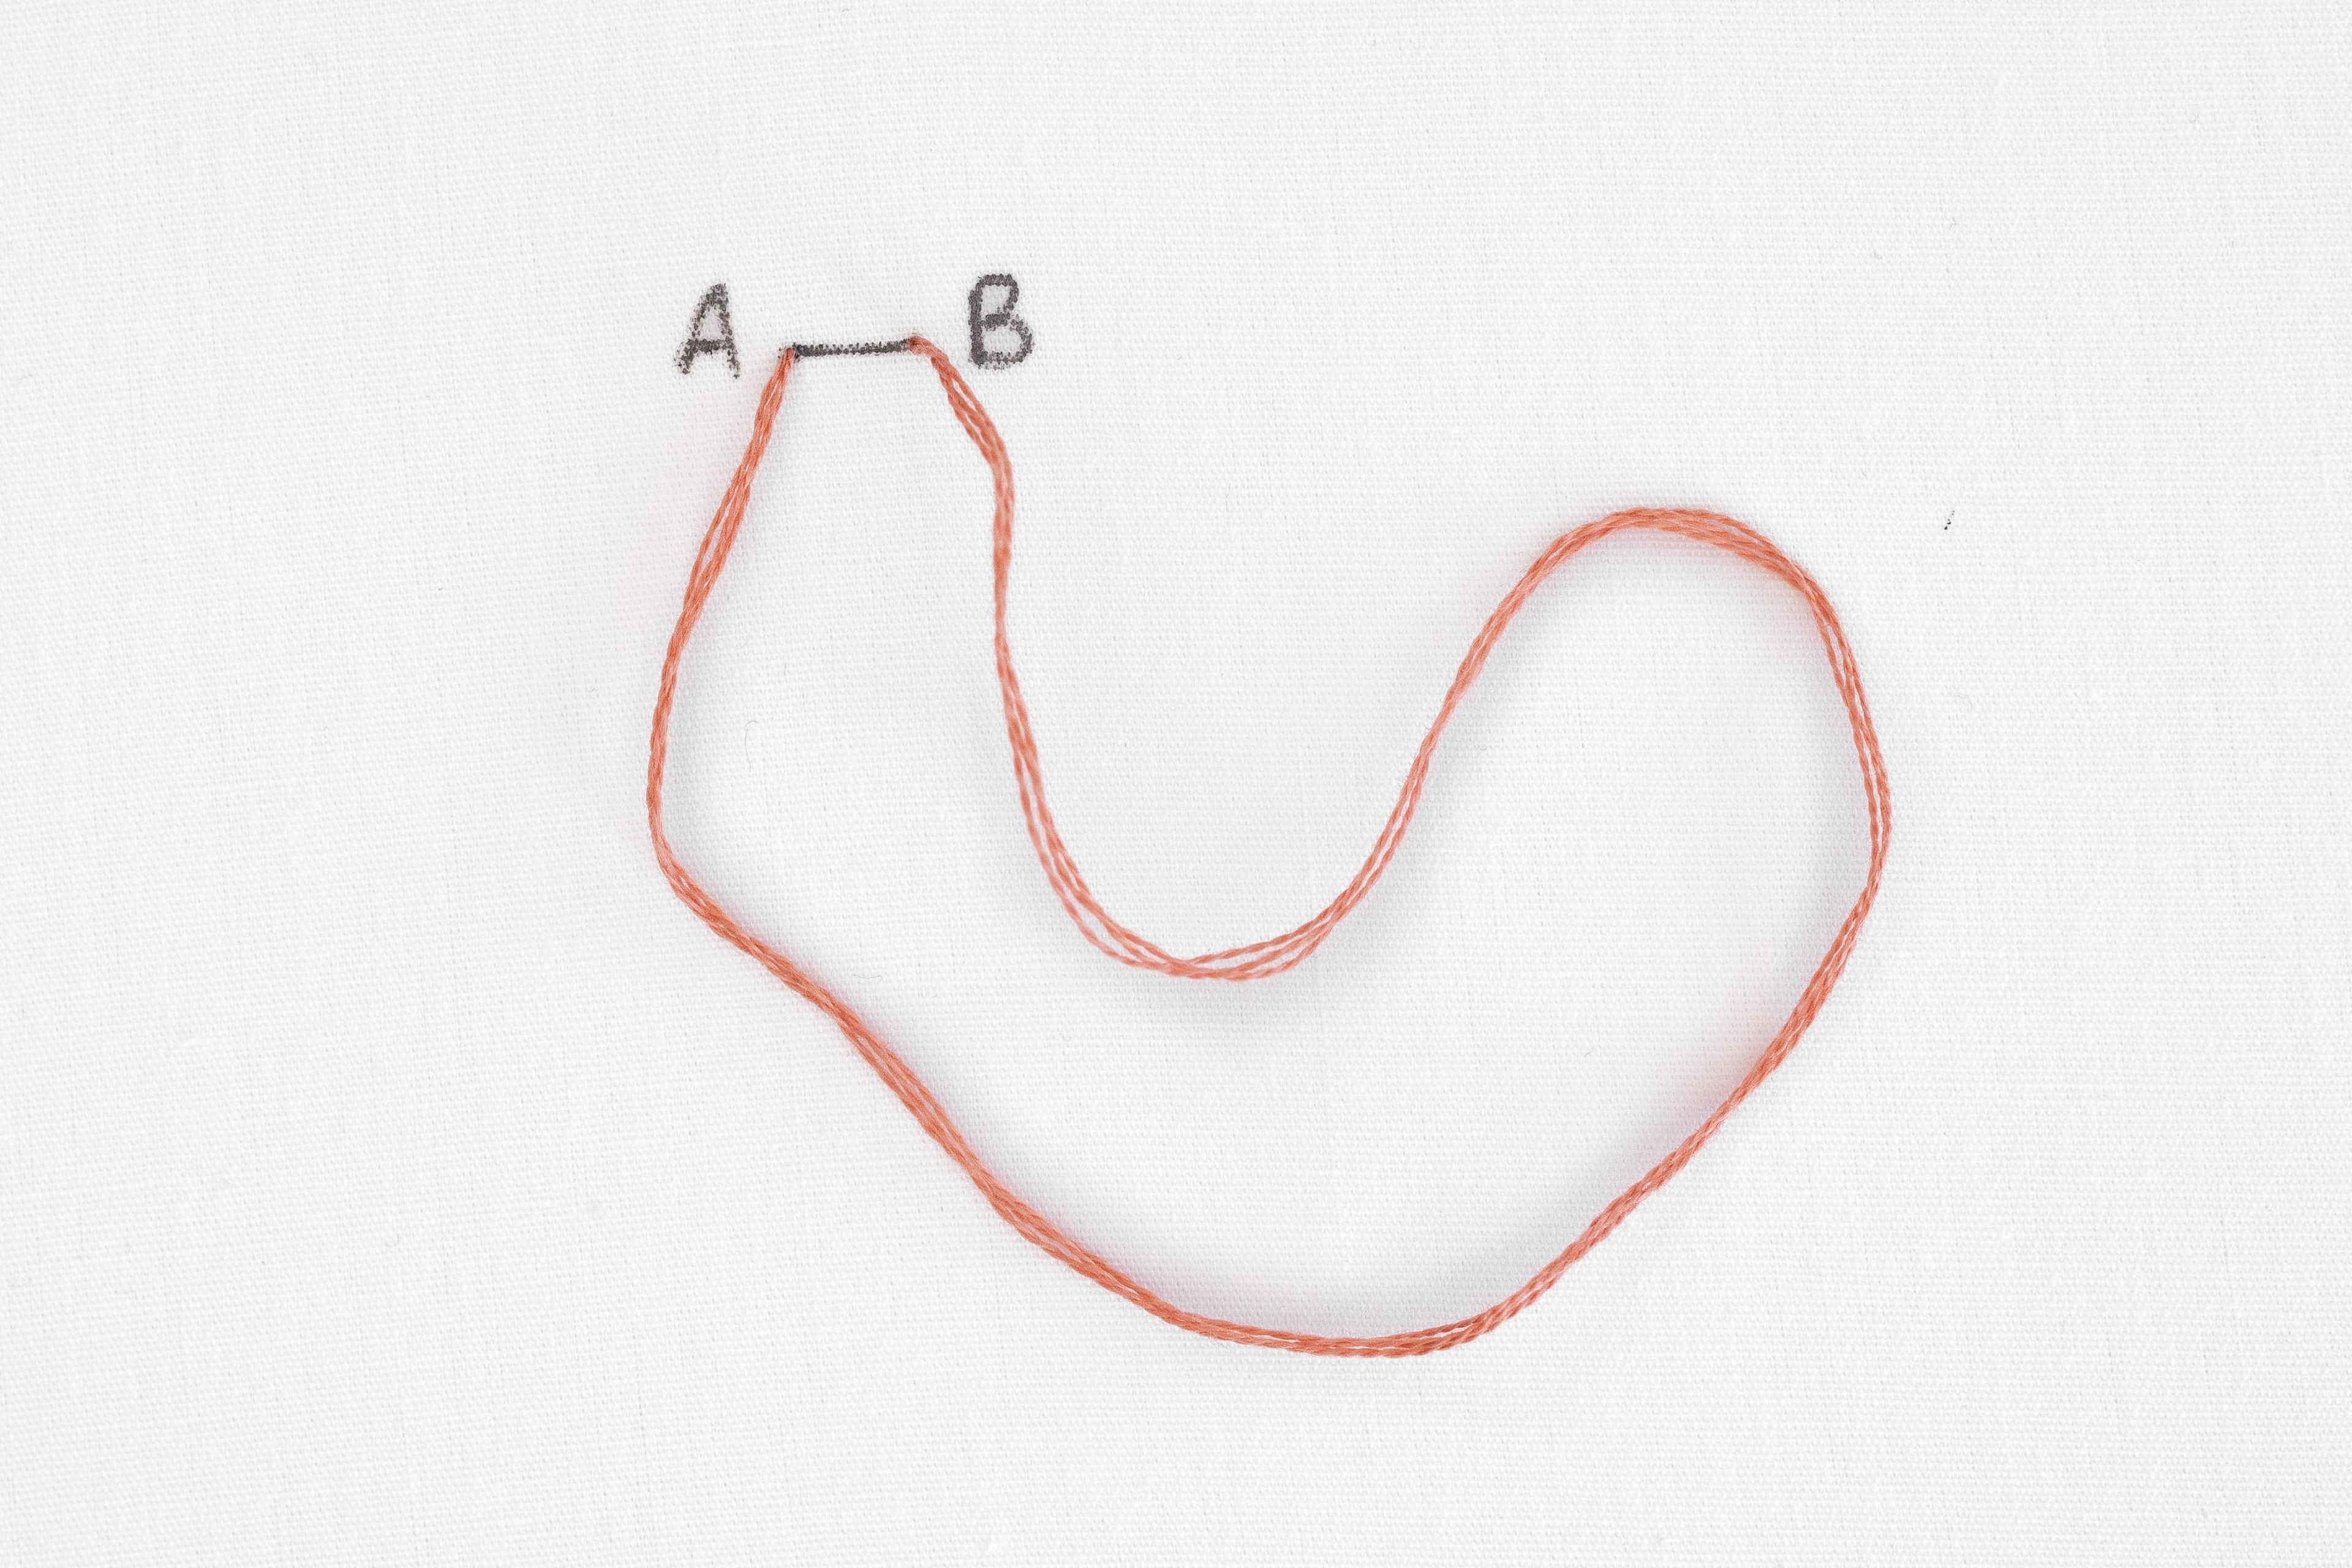
Poke your needle down at the end of the stitch (point B), but don’t pull through all of the working thread.
Instead, stop soon after the needle and tail have passed through to the back. This means you’ll be left with most of the thread on the top-side of your fabric, making a large loop.
Step 3
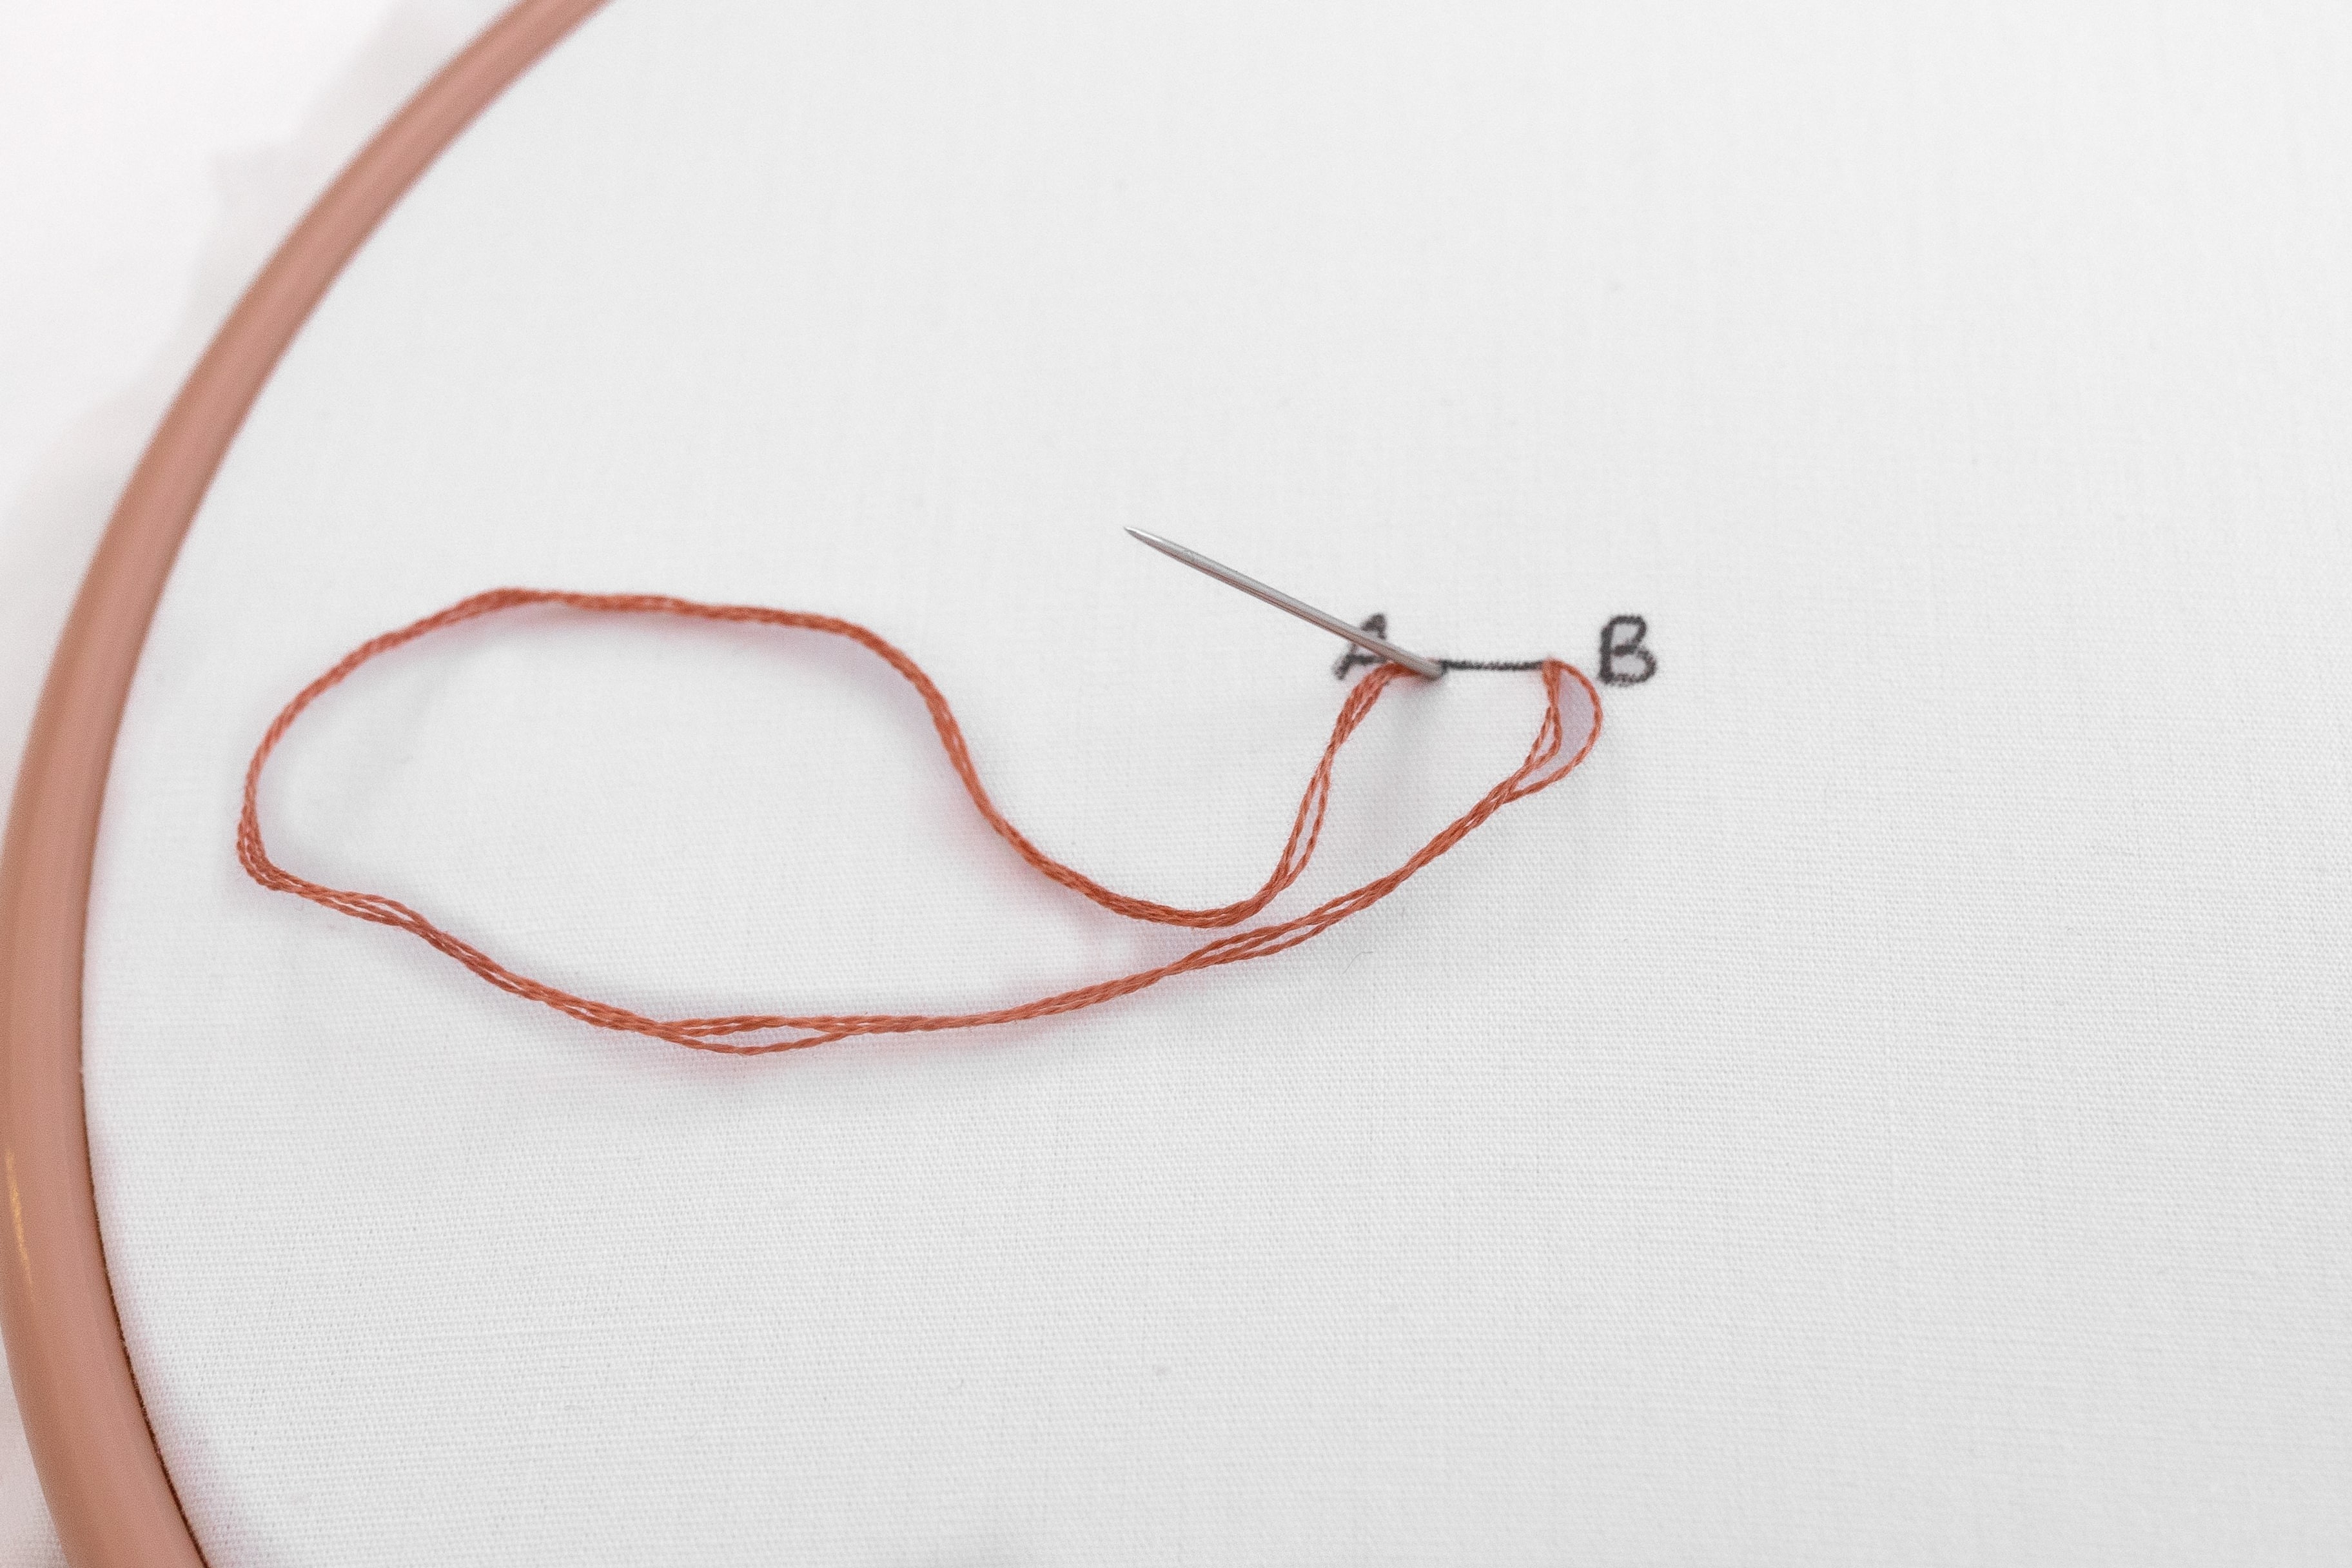
Now bring your needle back up at point A, either in the same hole or just beside. Once again go slow, and stop when about 2/3 of the needle is poking through tot he top-side of the fabric. Angle the needle so that it’s sitting up quite vertically.
TIPS:
-
Make sure you don’t catch your needle on the knot that secured your thread on the underside.
-
Take care that you don’t bring your needle up at point B by mistake, as I have many times, because your knot will pop loose before it forms, oops!
Step 4
Ok, now it’s time to make your wraps around the needle, which will form your lovely Bullion Knot. Let’s break this bit down into smaller steps:
-
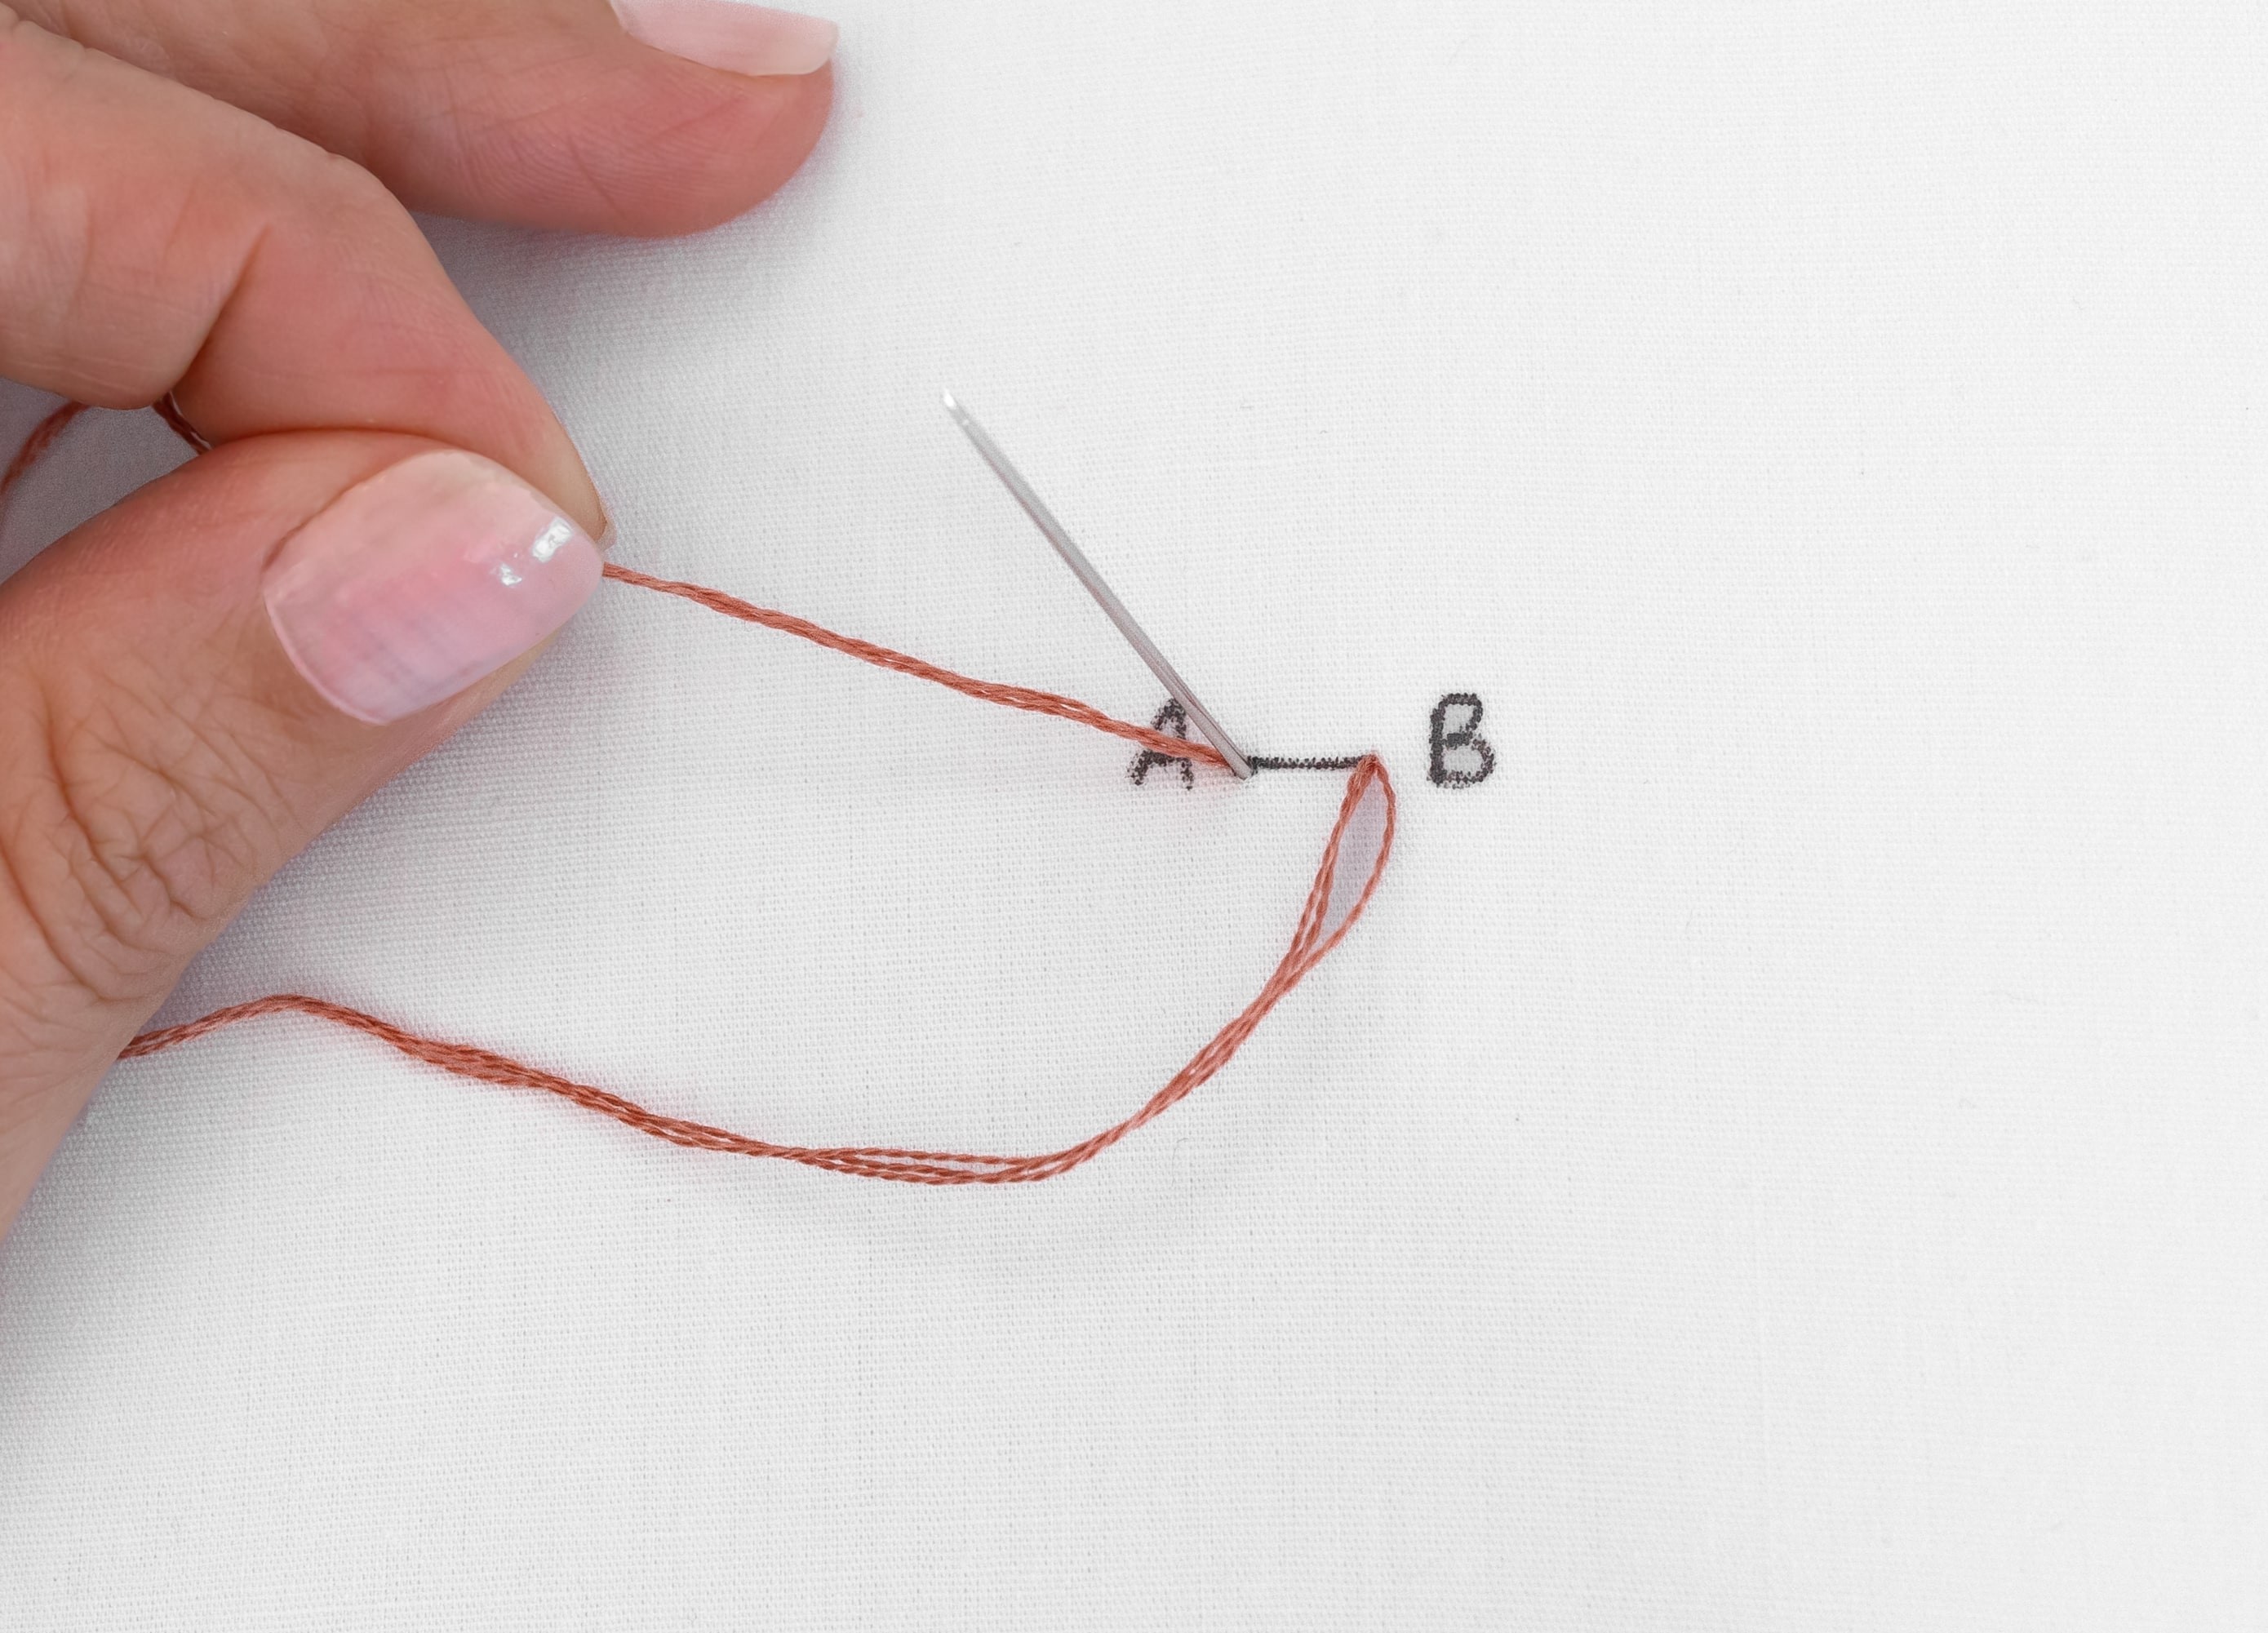
First of all, hold onto the part of the needle that’s still underneath your fabric, so that you’ve got a nice firm hold on it. I do this with my main stitching hand (I’m right-hand, so I use my right hand).
-
Use your free hand (in my case my left hand) to grab hold of the working thread near point A (near where it comes out of the fabric, beside the needle).
C. Now wrap the working thread around the needle, about 8 times, holding it firmly but not too tight. Don’t worry about whether you are going clockwise or anti-clockwise.
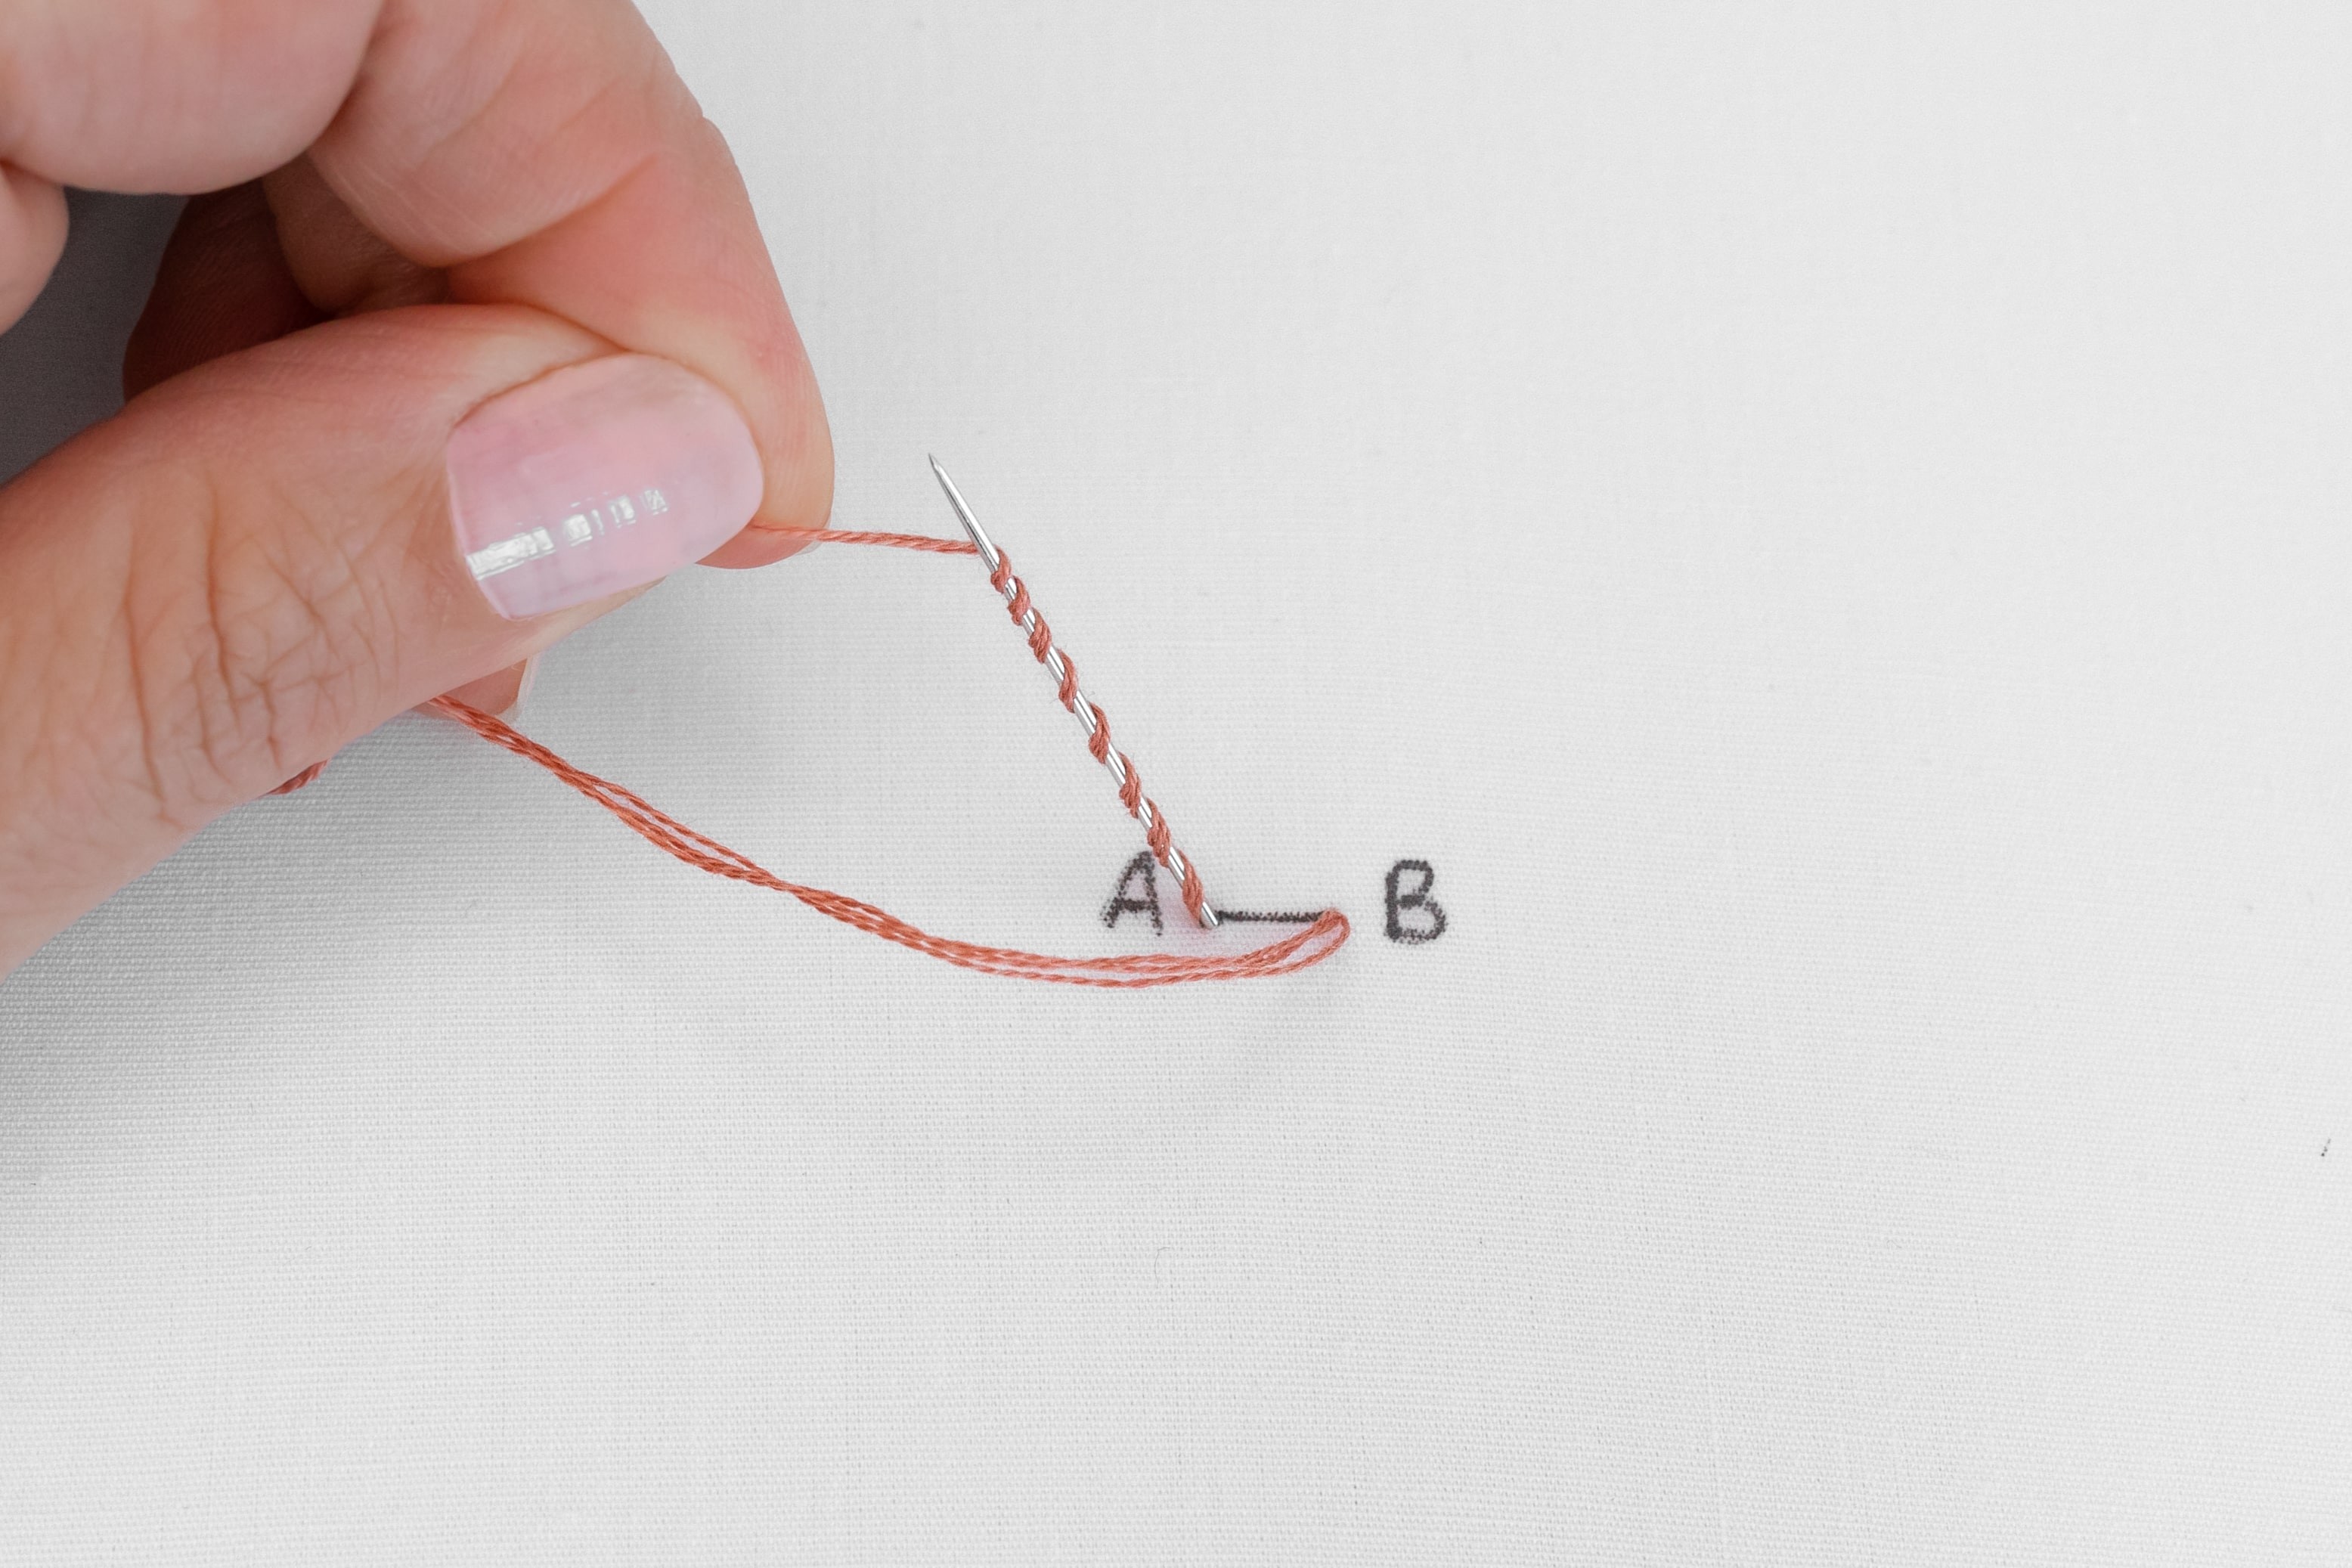
TIP: The tension here is important - you want the wraps to be tight enough that they stay on the needle and don’t pop off the end – but not so tight that they’re choking the needle. Don’t worry this comes with practice! But I recommend you go a bit looser than you might think, while you are learning.
D. Gently push the wraps down towards your fabric, and see how they form that really cool Bullion Knot shape?Now you can see where we’re going with this!

Before we go any further:
You may be wondering how many times to wrap your needle? You need to wrap it enough times, so that when the wraps are gently pushed down against the fabric, they are about the same length as your stitch. This will depend on how much floss you’re using.
A helpful tip is to tilt your needle in the direction of your stitch and visually gauge the number of wraps you need. If you’ve wrapped it too many times, you can simply unwrap a few. And if you need more wraps, you can continue wrapping and push them down again. Over time, you’ll get better at eyeballing this part of the process.
But for now, about 8 wraps is great for a 1⁄4 inch stitch using 3 strands of floss.
Step 5
Once you have enough wraps, make sure they’re pushed down against the fabric, and gently hold them in place with your left hand. I find it best to press them between my thumb and forefinger.
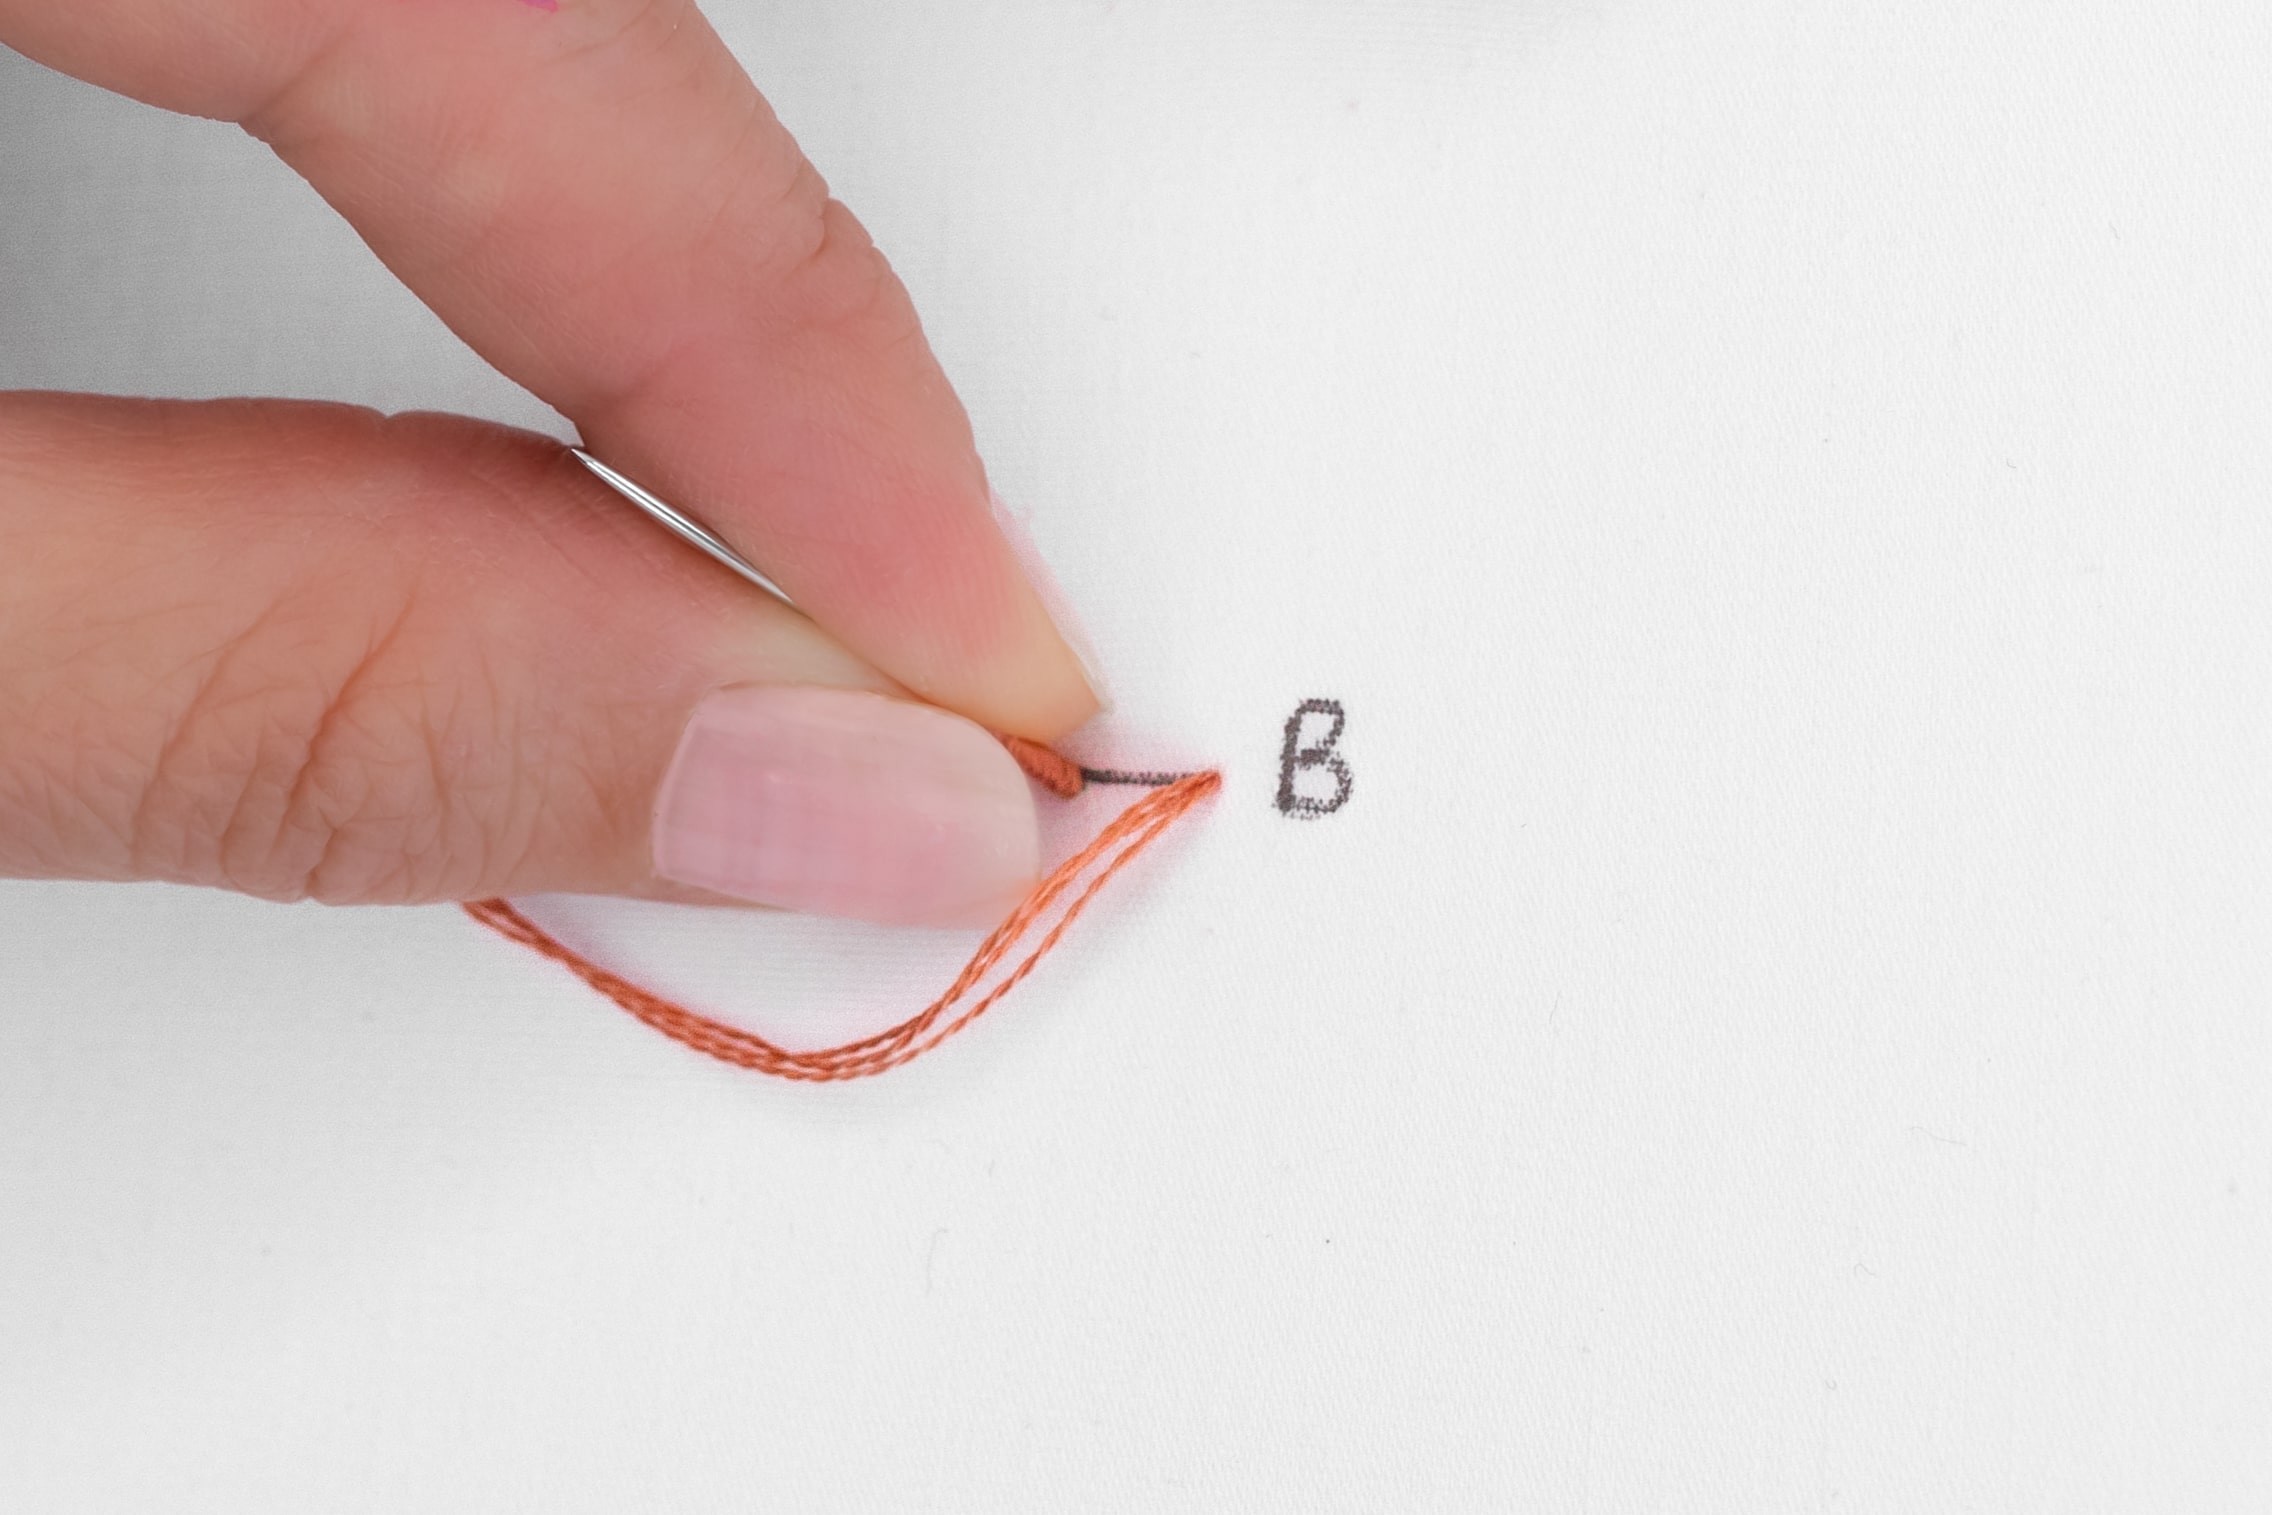
Step 6
Now here’s the trickiest part – which is pulling the working thread through the wraps. So first, use your hand under the fabric to push the needle up as far as it will go.
Then bring that hand to the top-side and use it to pull the needle and working thread up through the wraps. Keep holding the wraps gently in place with your other hand, while you pull the thread through.
At first, you might feel some resistance, particularly when the tail end is folded over the thread – then it should get easier.
As you get near the end, pull the slack in the direction of point B, and keep going until most of the thread has been pulled through.
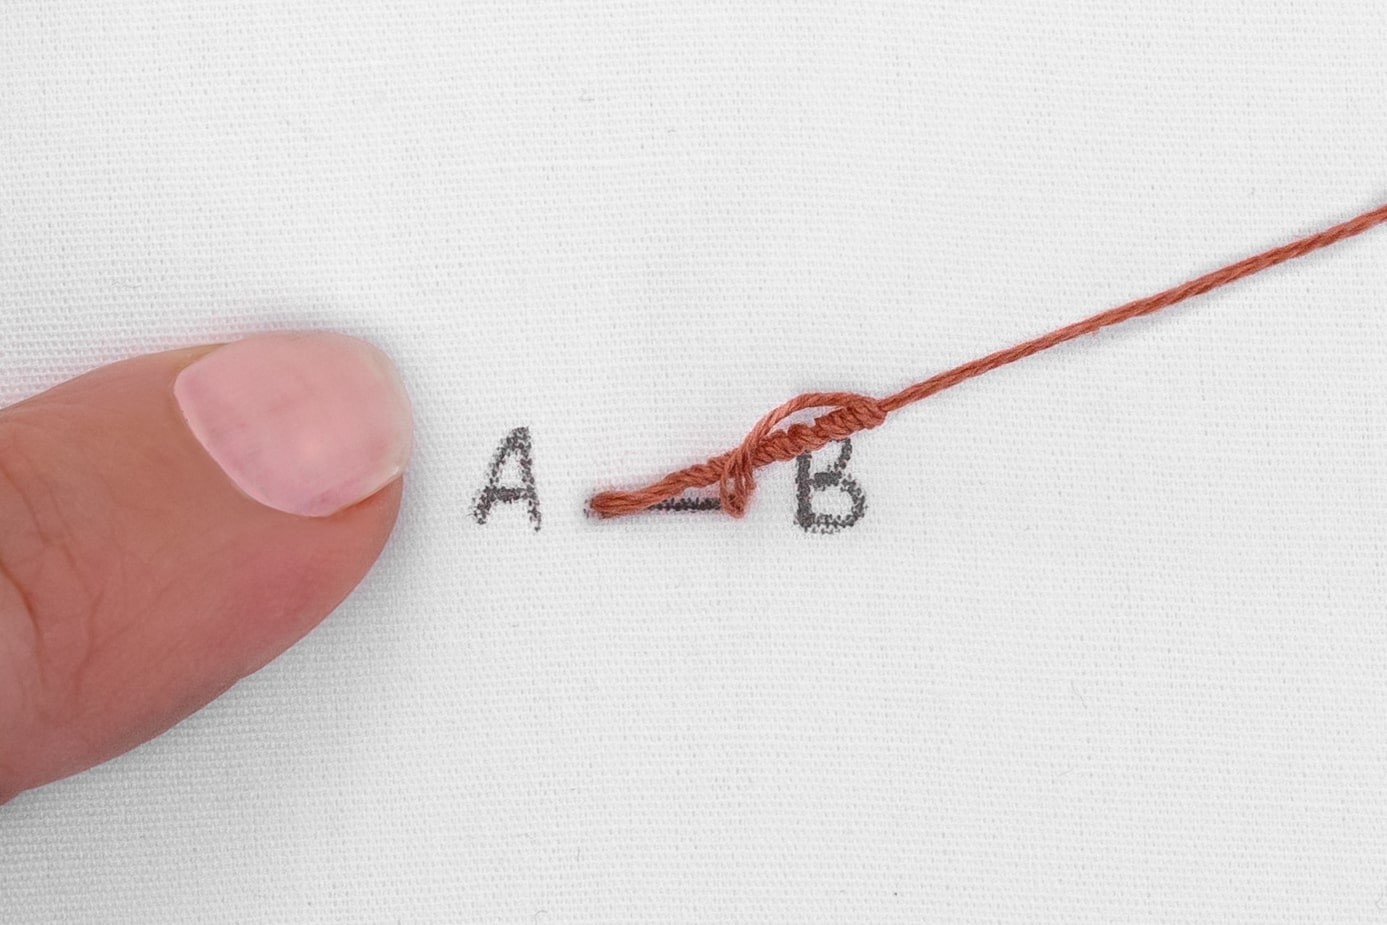
As mentioned, this step can be quite challenging, but trust in the process and keep at it!
HERE ARE SOME MORE TIPS:
-
When you are working through step 4 above, avoid wrapping too tightly around your needle.
-
Make sure you’re only holding the wraps lightly with your other hand.
-
Swivel the needle as you pull it through – the back-and-forth rotation really helps to free it up.
-
Don’t yank the needle, just go slow.
-
If it’s super stuck, you can check the underside of the stitch and try loosening the threads with the blunt end of your needle – I find that sometimes frees it up to flow better.
Step 7
Now it’s a case of guiding the wraps into the lovely shape of the Bullion Knot. I like to use the needle (or my free hand) to gently press down above where the furthermost wrap is sitting, as I draw the slack towards point B.
Try this, and watch how the wraps slowly gather and form into the lovely coiled shape.
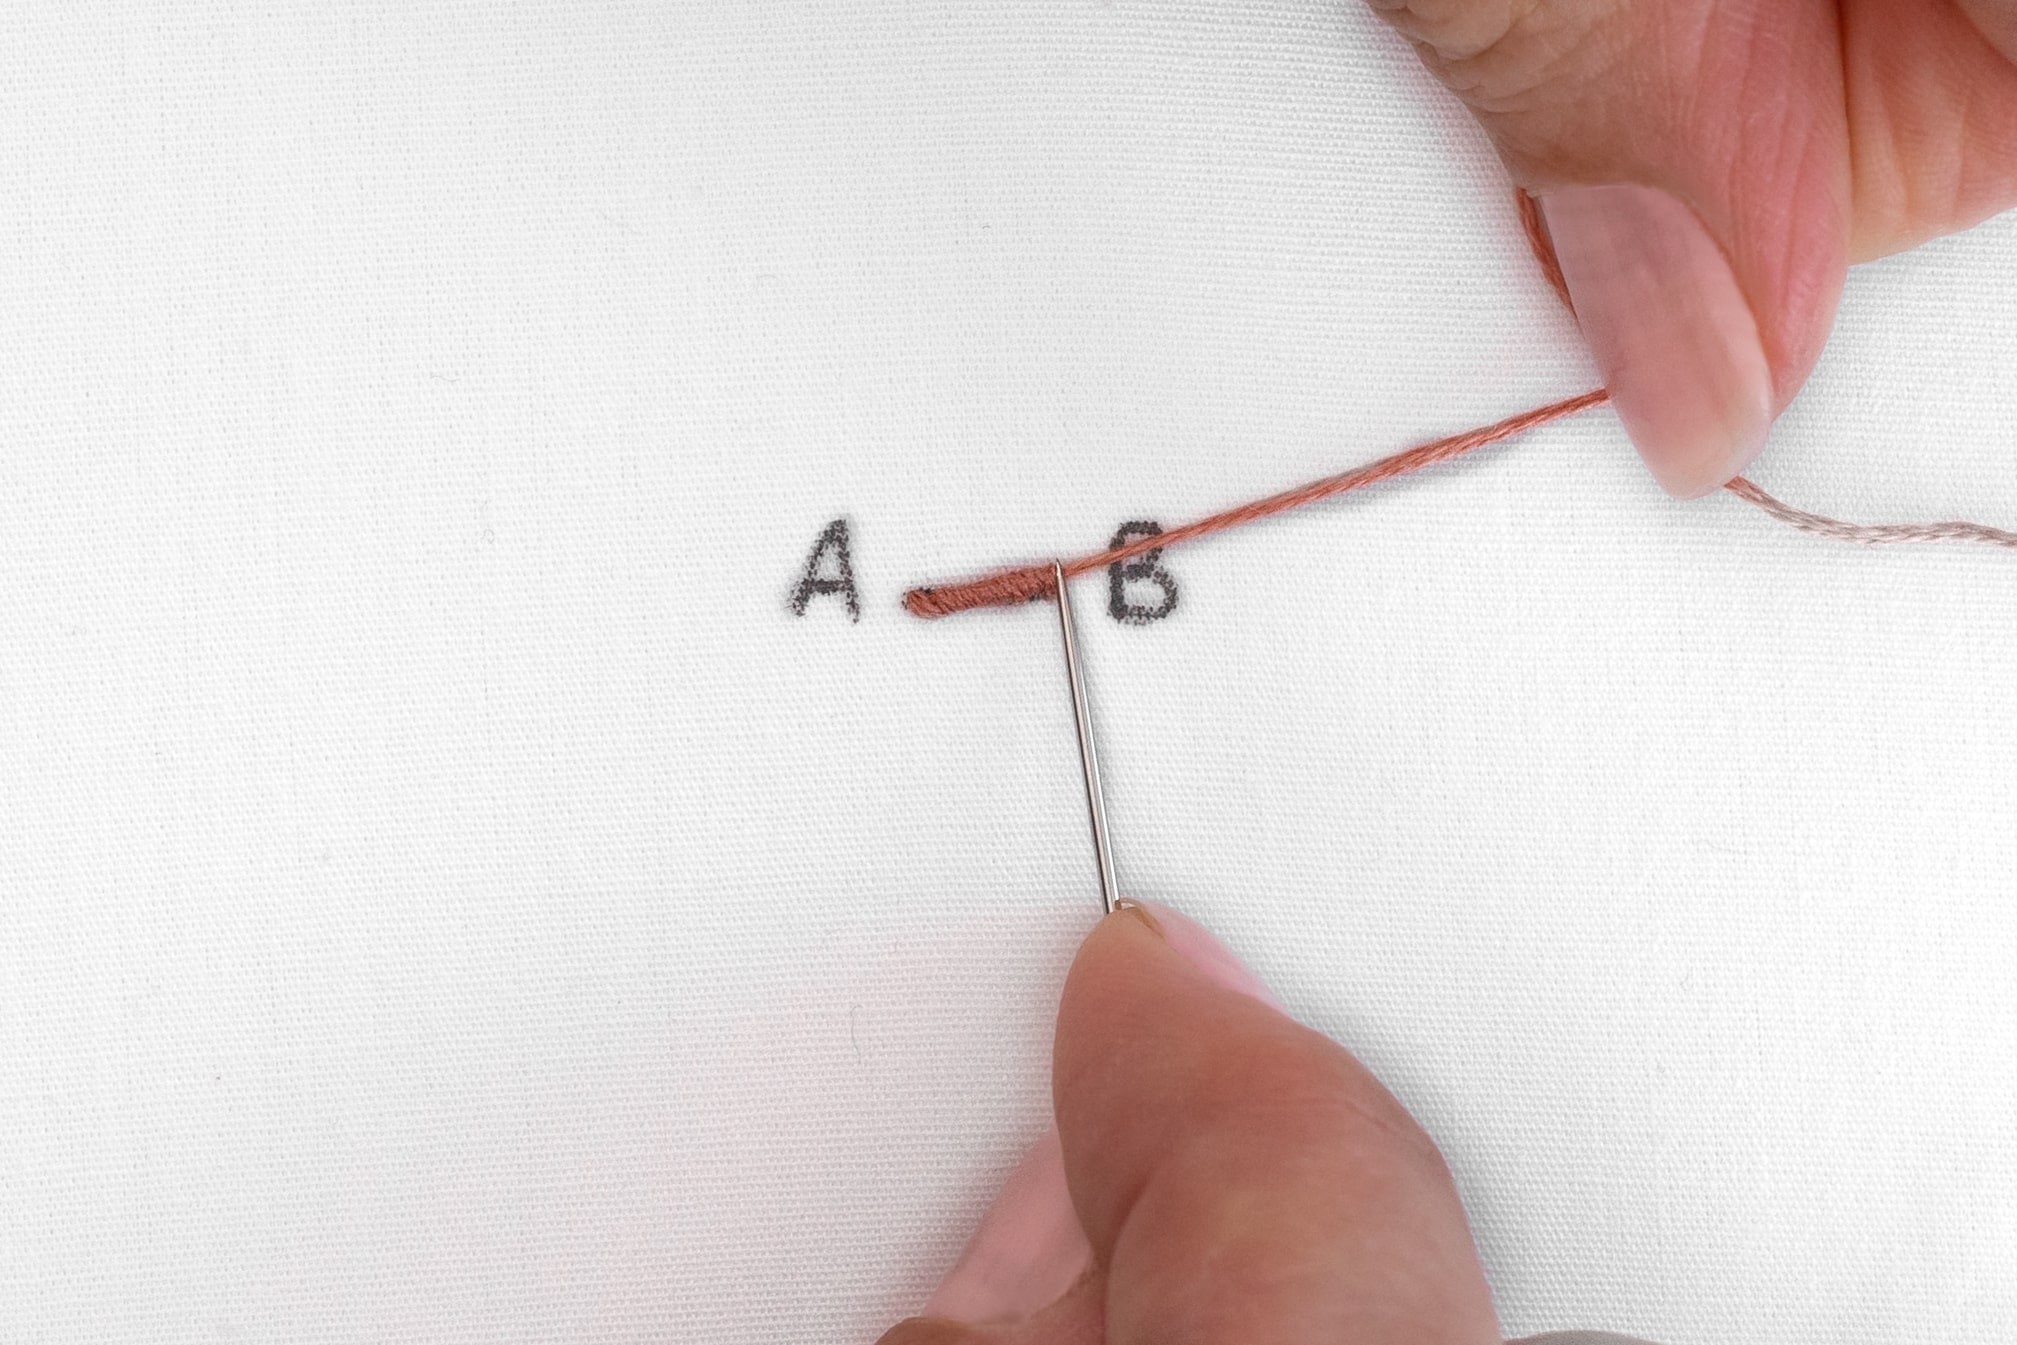
TIP: You can be quite free by using your needle to nudge the wraps into place. Get right in there, even working underneath the wraps, as you pull it into shape.
And don’t worry if your wraps look super untidy and loose (and all over the show) at first!
Just keep following the process, and after a while, you will (hopefully!) be amazed at how the wraps start to gather into the Bullion Knot shape.
Step 8
Once the wraps are all sitting in place, secure the Bullion Knot by poking your needle down at the end of the stitch (point B). Draw all the slack through to the underside.
Then you can either secure off your thread or start on your next knot.
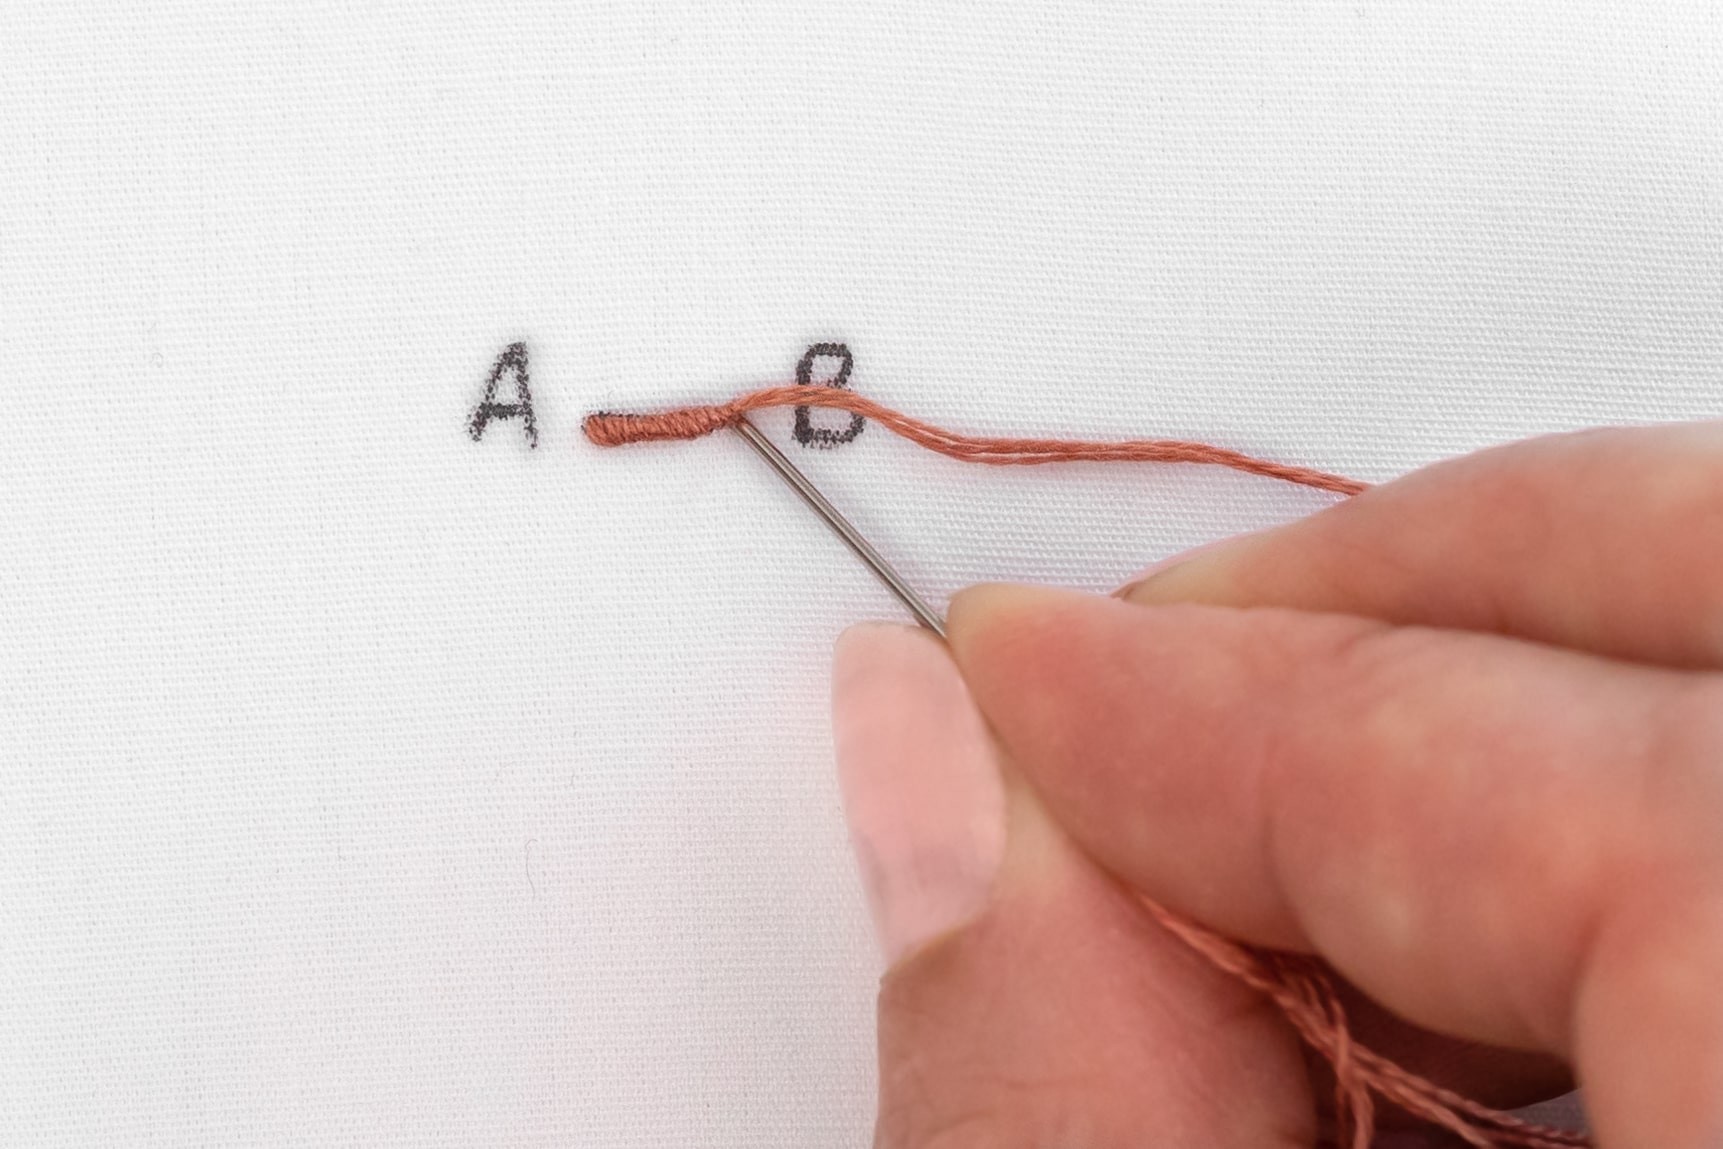
Ok, so how did that go? I hope you learnt lots! Don’t worry if that didn’t work out, with a little practice and experimentation, you’ll soon get the hang of it.
Just remember that Bullion Knots can be a bit tricky, so be patient with yourself and keep working your way through the steps. I have absolute confidence you will succeed with making Bullion Knots, and feel so proud of how far you’ve come!
And hey, if all else fails, you can always pretend that your wonky bullion knot is just part of your unique, artistic style. Who needs perfection anyway, am I right?
HERE ARE SOME MORE TIPS:
-
Securing each knot: While you’re learning, you may wish to securely knot off each successful Bullion Knot and start afresh on the next. This means that if you need to cut out a knot that went awry (believe me, it happens!), then you won’t lose all of your hard work.
-
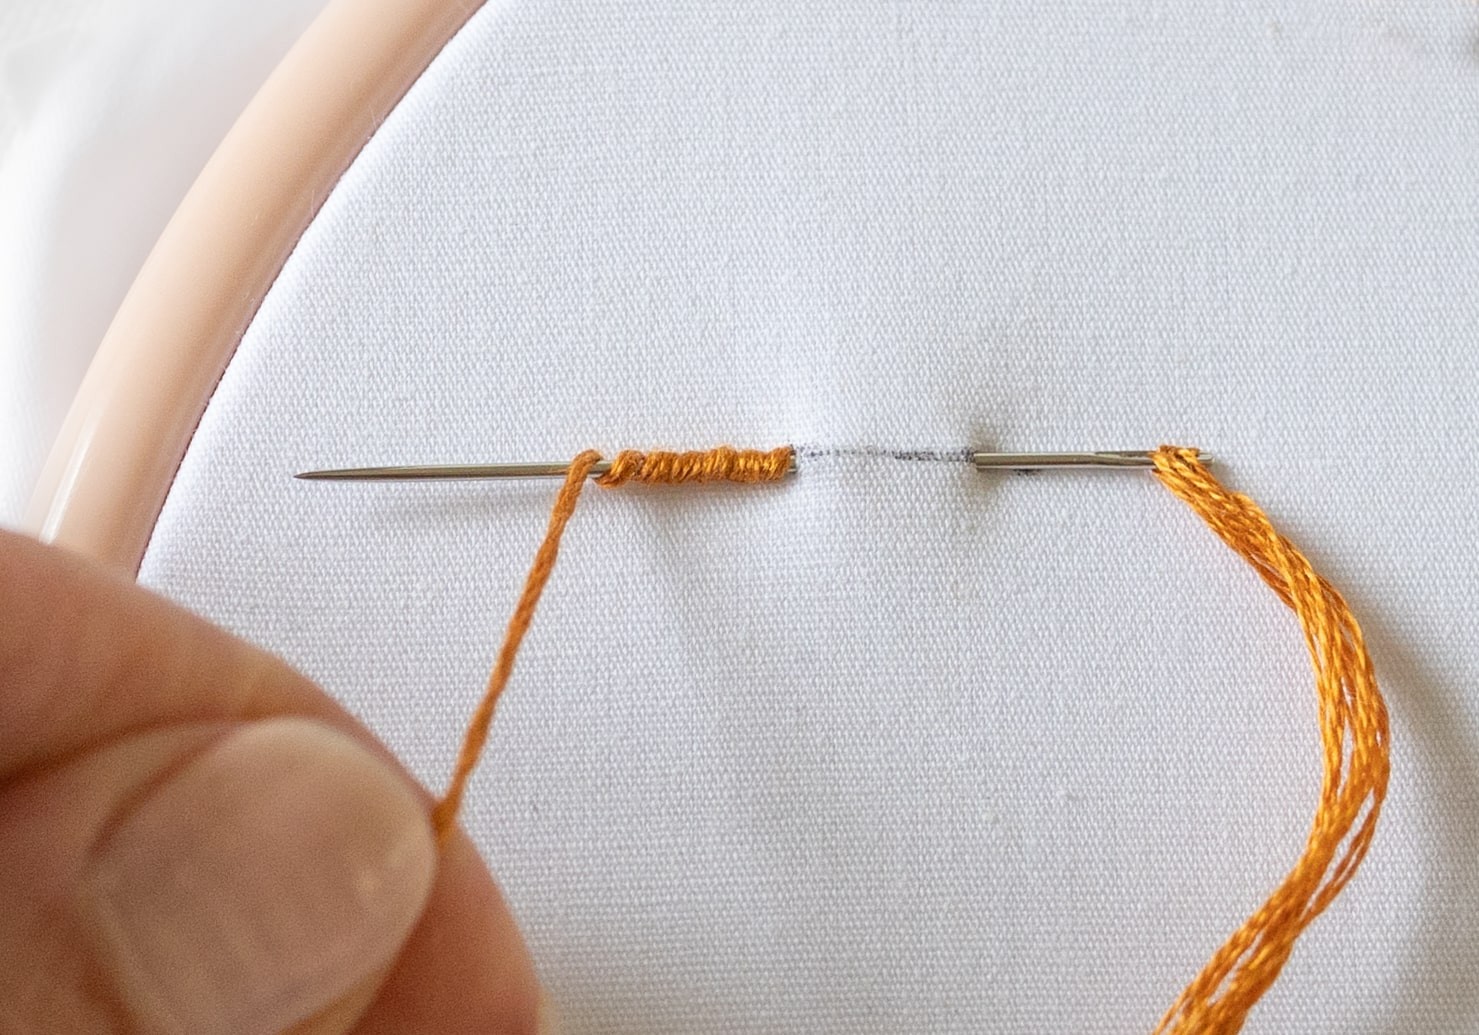
Sewing method: A lot of tutorials teach Bullion Knots with a ‘sewing’ technique, as pictured. I found that way quite a lot more difficult compared with the method I’ve taught in this tutorial. But there is no right or wrong, so please do what works for you.
-
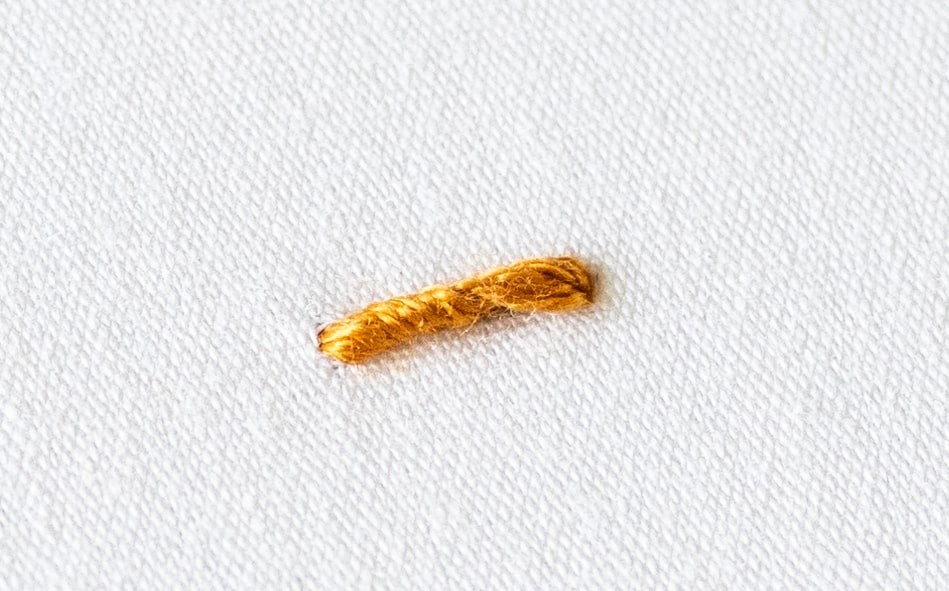
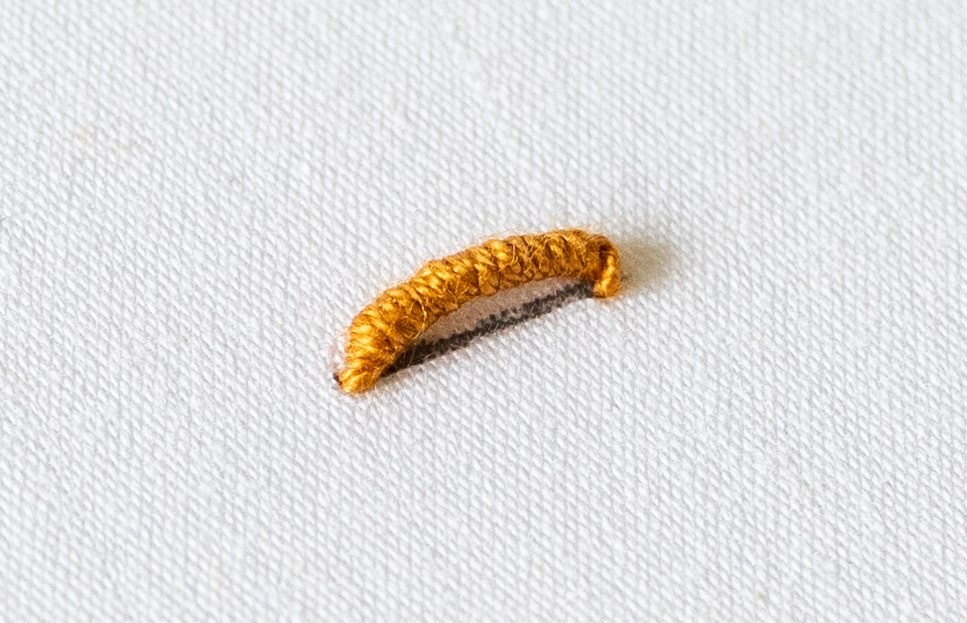
Number of wraps: If you want to create a straight and uniform knot, it really helps to create your Bullion Knot with the right number of wraps. This definitely takes practice! Let’s look at what happens otherwise:
» Too few wraps: see how the working thread is poking out the right-hand side of the knot, rather than the knot being made up entirely of wraps? It’s not the end of the world, but it doesn’t look as great as it could.
» Too many wraps: The wraps don’t have enough space to sit straight, so they coil into a curved knot. This isn’t necessarily wrong because, in some designs, you actually want your Bullion Knots to curve! But it’s not helpful if you’re trying to create straight knots.
Examples of Bullion Knots in my patterns
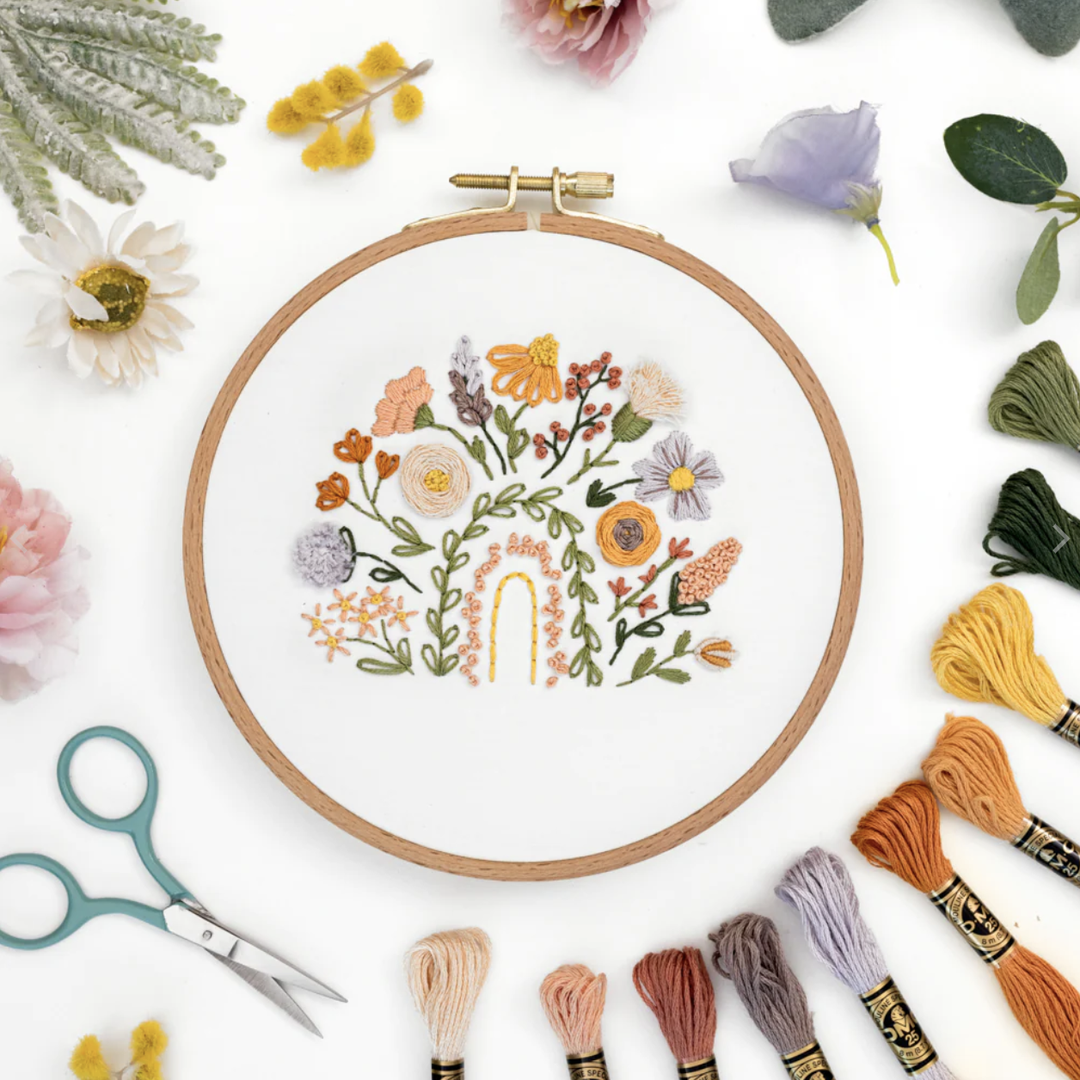
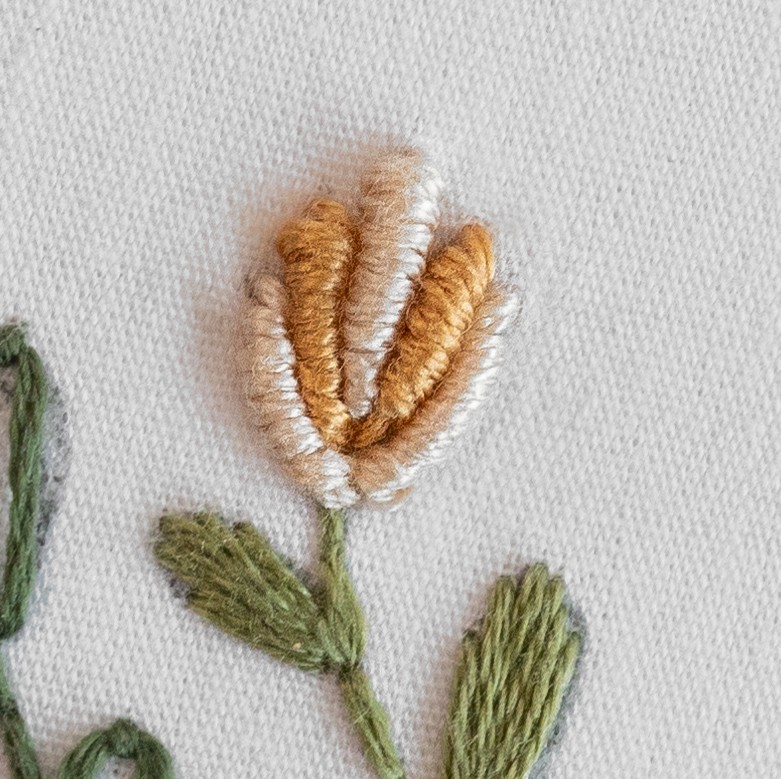
Let's look at some beautiful examples of this stitch technique in my patterns. Bullion Knots are used to create the petals of the daylily flower in the Floral Rainbow Sampler Pattern.
Doesn't it create such a wonderful fun texture?
Next Steps
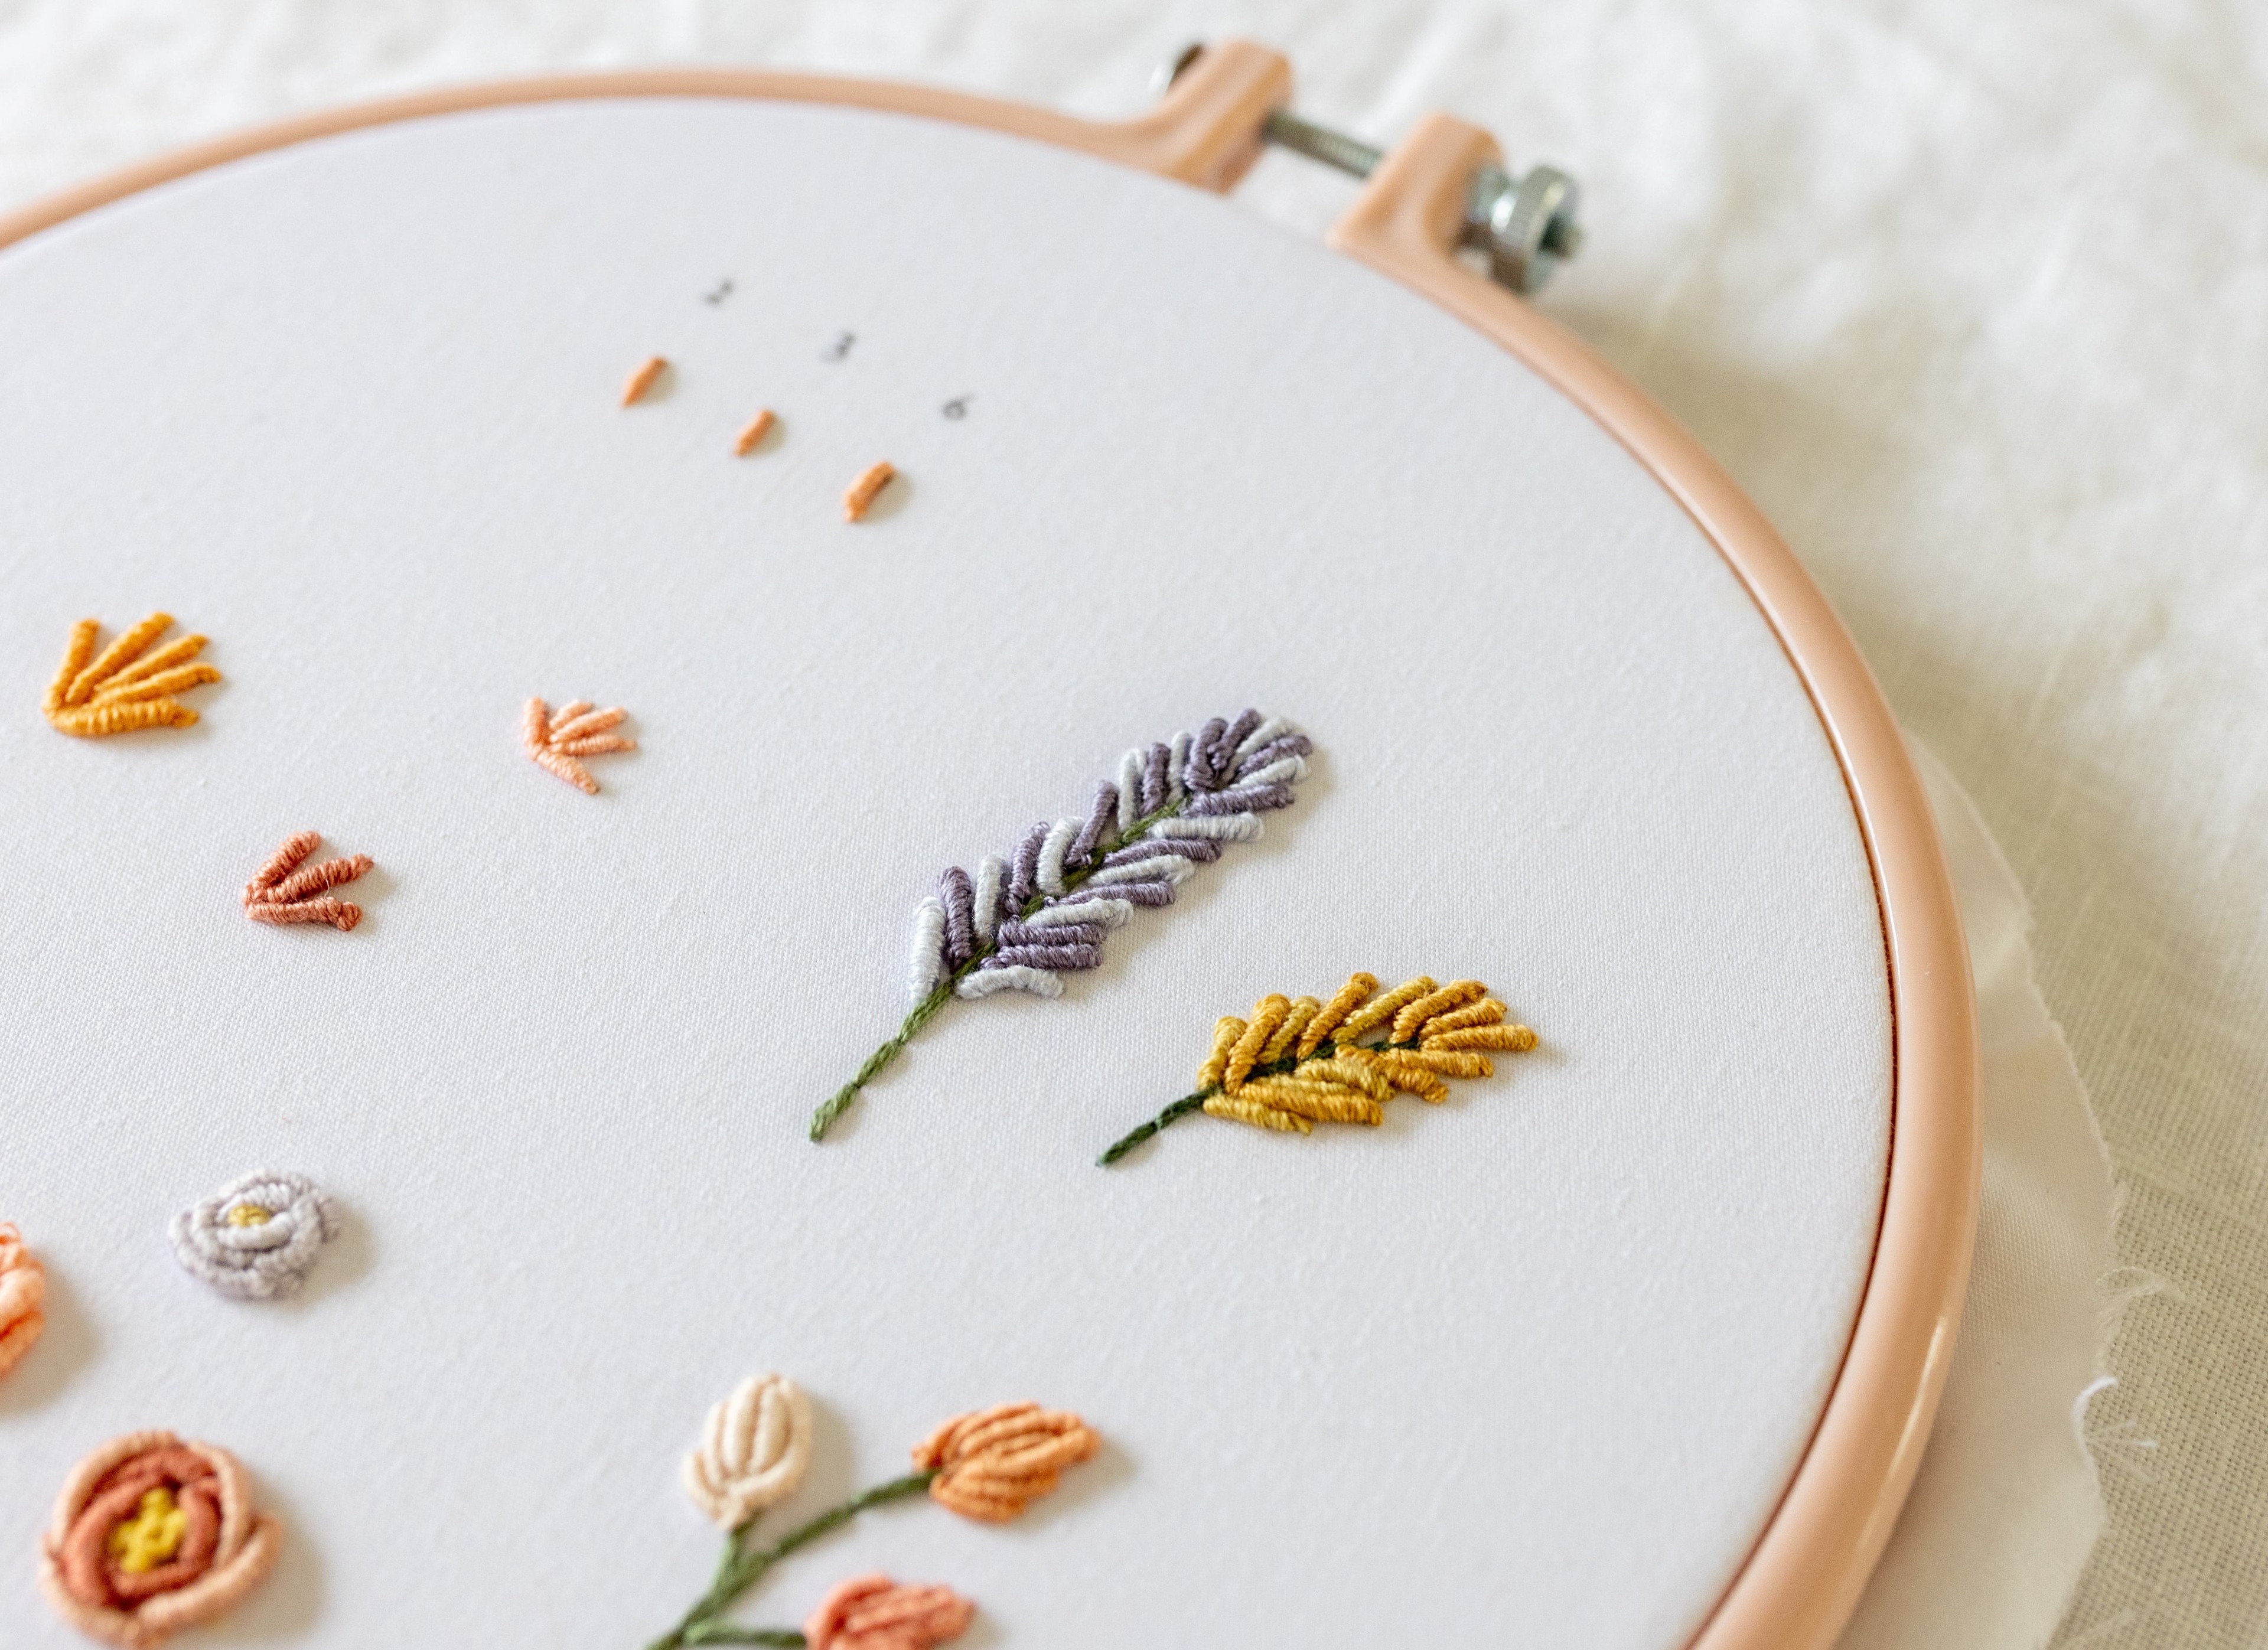
Once you’ve built up some confidence with this technique, you can experiment and enjoy creating some really cool raised embroidery effects! For example, try grouping your knots to form floral shapes.
Play around with the placement of your knots, so that some sit nice and snug against each other. I think you’ll find that in the end, this technique can actually be quite forgiving, especially when the knots are grouped together!
I hope you really enjoyed this tutorial and it has helped you to make progress with your Bullion Knots.
What's next?
Our beginner embroidery kits are a favourite among new stitchers for their simple, step-by-step instructions and beautiful designs that make learning easy and fun. Whether you’ve been wanting to learn embroidery or are just searching for your next creative hobby. These kits are the perfect introduction to embroidery.
Why people love our beginner kits:
-
Everything you need is included: fabric, thread, hoop, and more!
-
Clear instructions to guide you every step of the way.
-
Gorgeous designs you’ll be proud to display.
Our most popular beginner kits
P.S. Have you checked out this blog yet, 'Learn Modern Embroidery for Beginners with this FREE Pattern?'

