Binding Your Hoop- Learn This Modern Embroidery Technique
Introduction
If you find that your hoops aren’t quite holding your fabric taut, and you have to keep pulling your fabric into place and re-tightening the screw, then binding your hoop is a really handy option. It’s a method where you wrap your inner hoop with fabric or tape, which increases the size of your inner hoop, thus creating more friction between the two sides of your hoop. And this should mean the hoop has a more secure grip on your fabric, and will hold it tight for longer!
It’s also handy when you’re working with fragile fabric, or moving your hoop around a larger piece, because a bound hoop is softer on your work than the wooden hoop, and leaves less of a crease. It’s a great option for making cheaper or vintage hoops more user friendly. I’ve been told by some experts that this is an absolutely essential step for embroidery work, so let’s give it a try!
I’ll show you how to do this with plain cotton tape, but you can also experiment with twill tape, bias tape and even strips of cut fabric (try cotton) – just don’t use anything slippery like a satin ribbon. The size of your hoop will dictate how much you need. For example, I used about 140cm of 12mm cotton tape, for an 18 cm hoop.
Here’s a simple way to bind your hoop that’s worked well for me:
Step 1.
Separate your hoops, then put the larger one to the side.
Step 2.
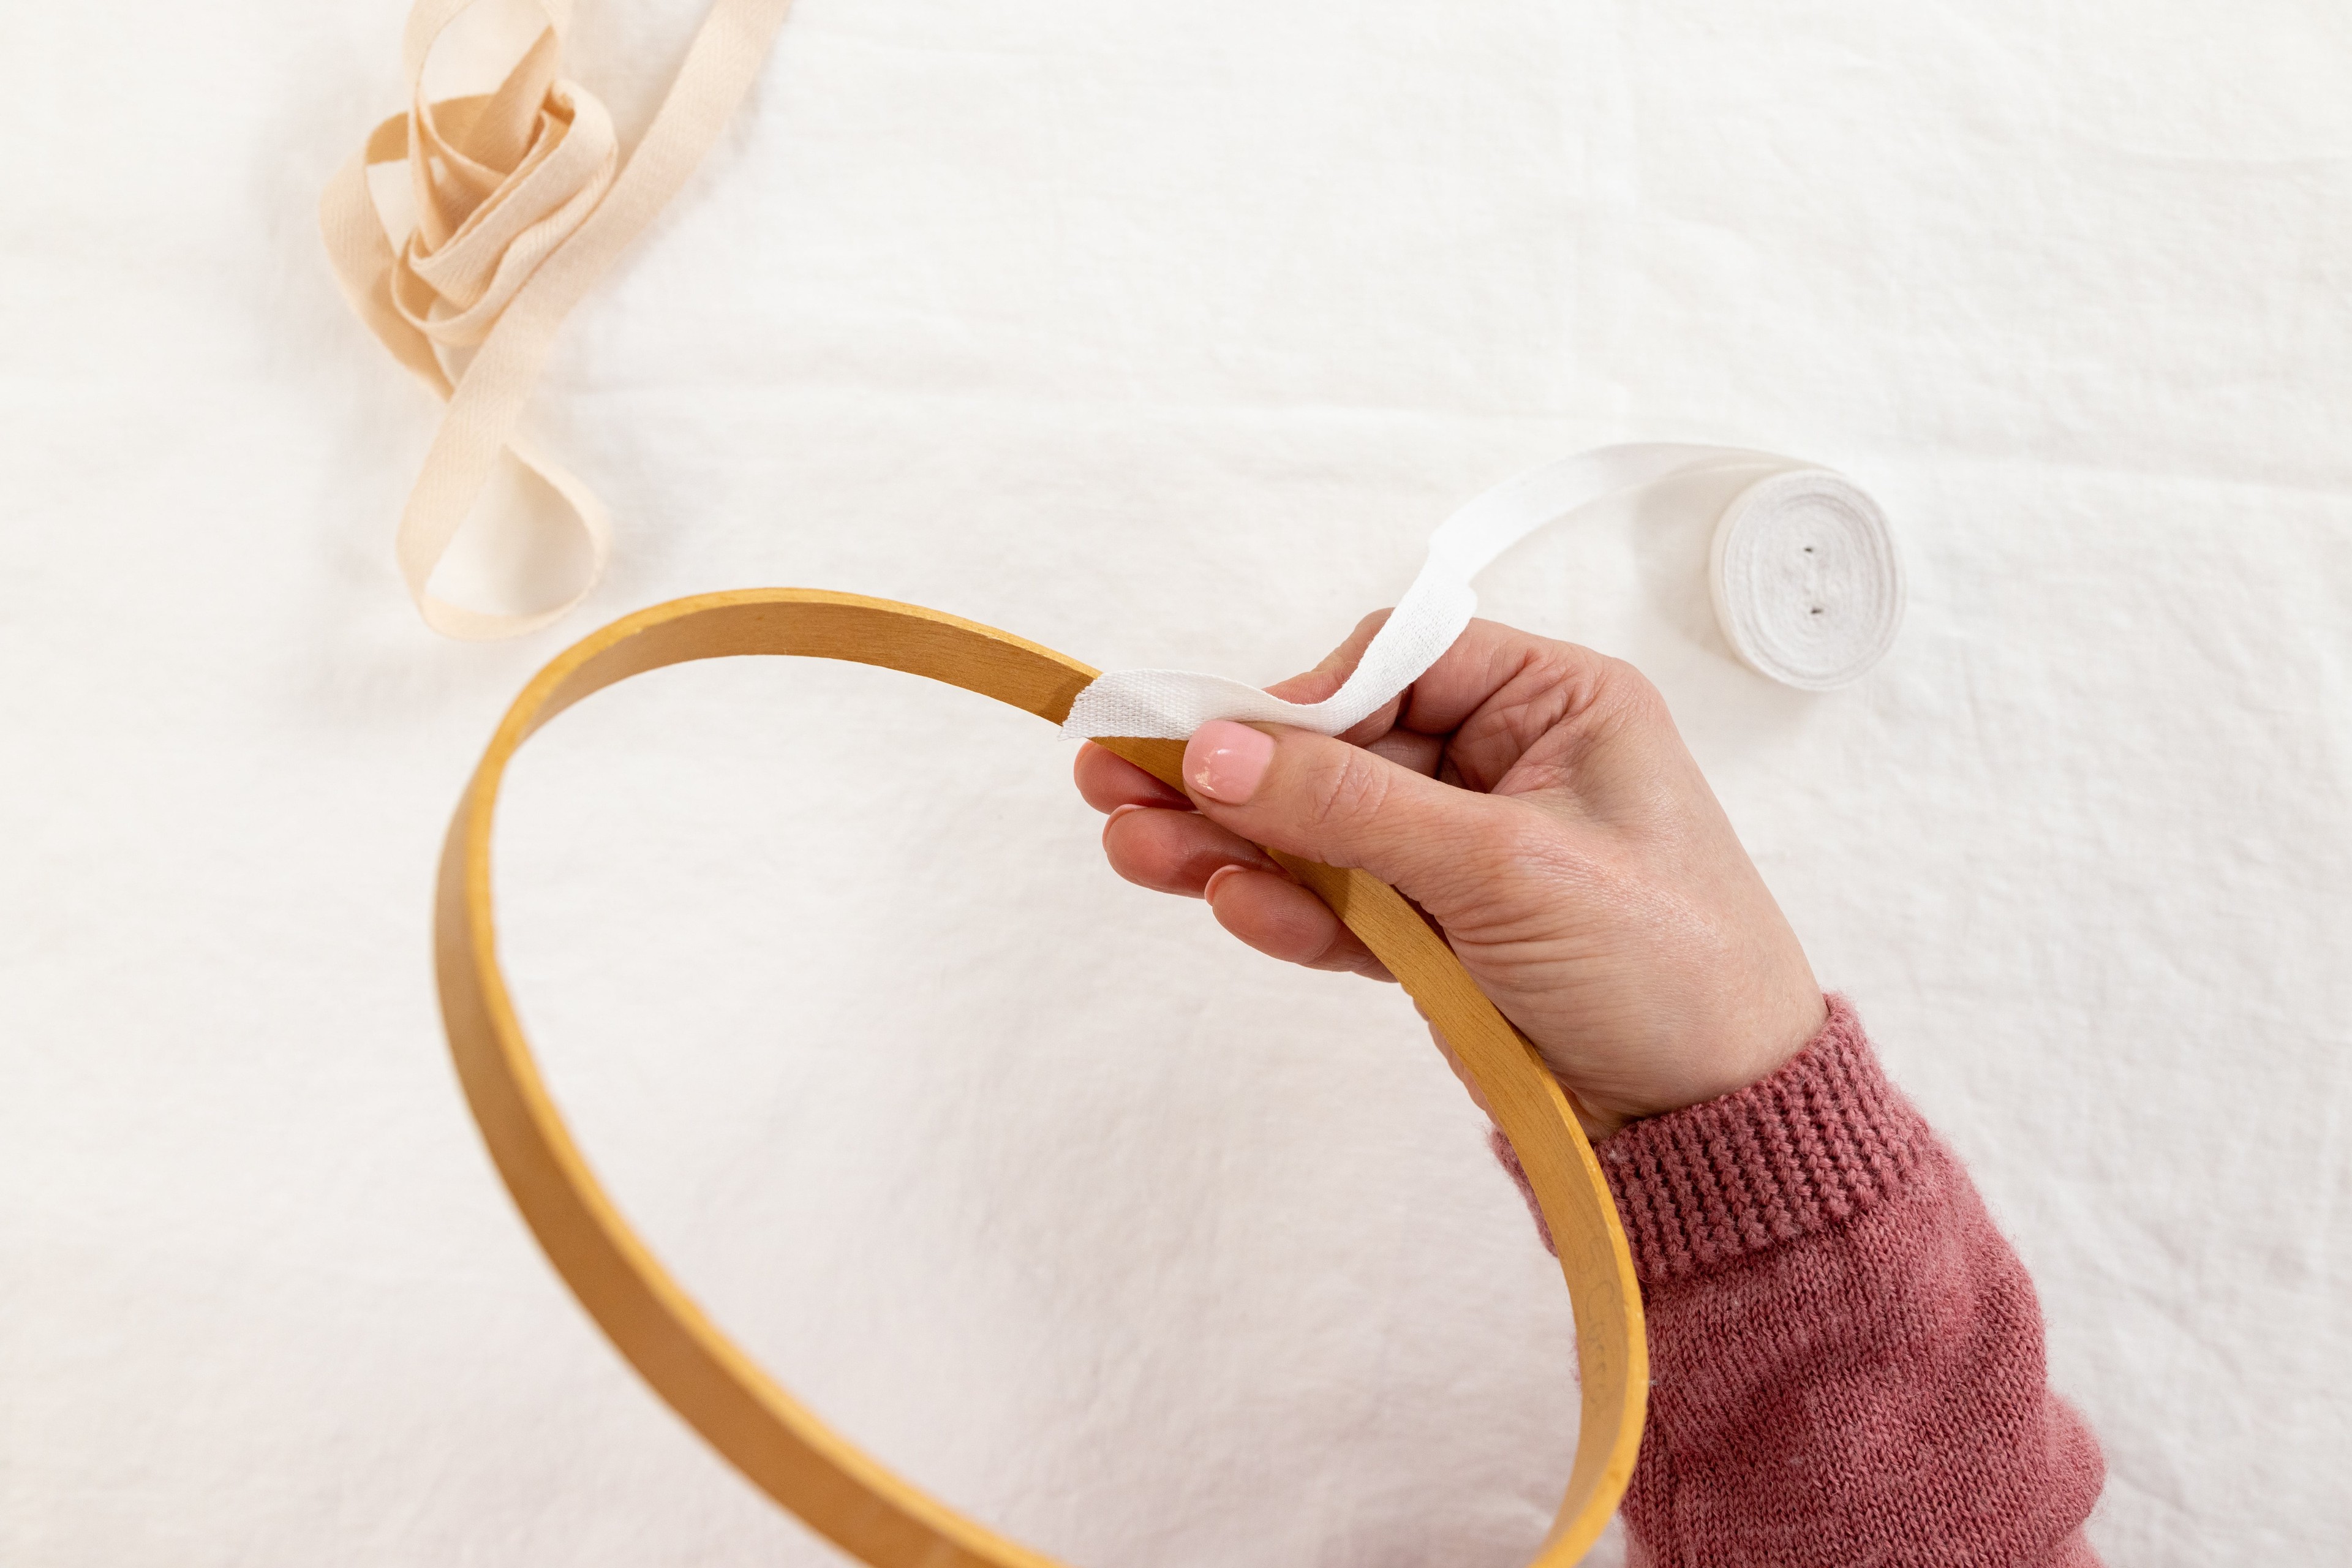
Grab your inner hoop, and place the end of the tape on the inside edge at a bit of an angle. You will need to hold this in place while you start wrapping the tape (don’t worry about securing it down, because it will get held in place as you start winding).
Step 3.
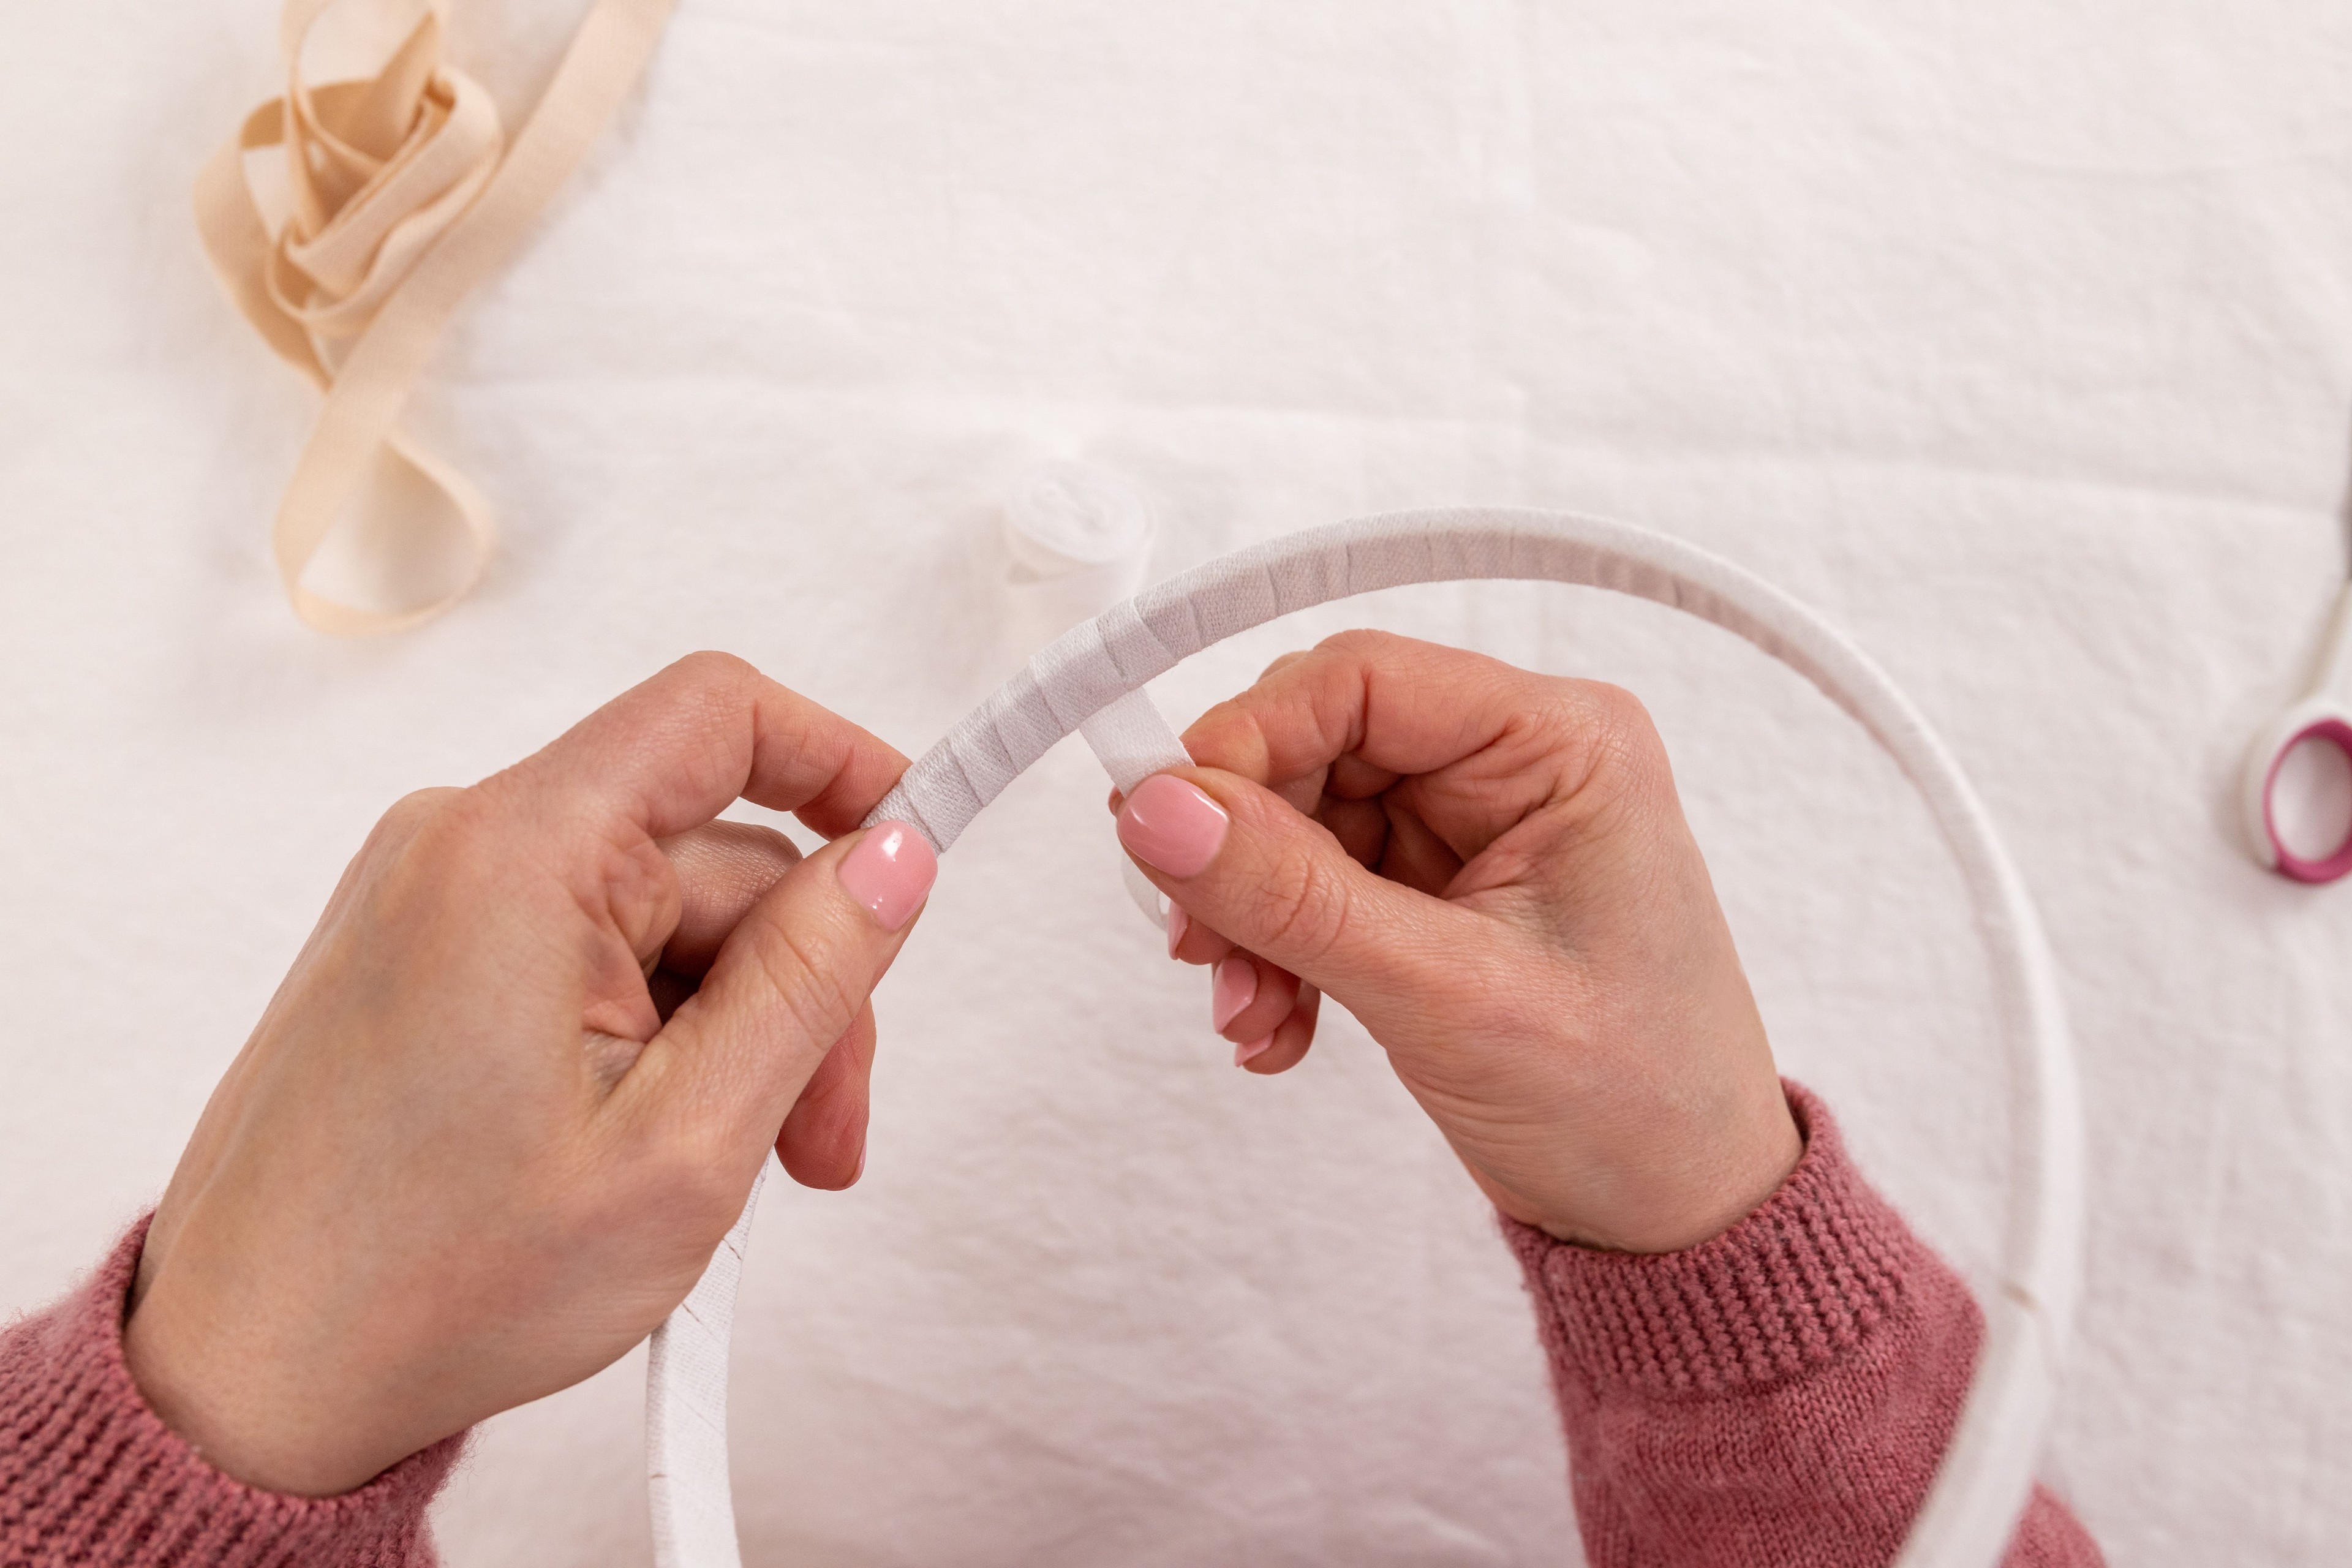
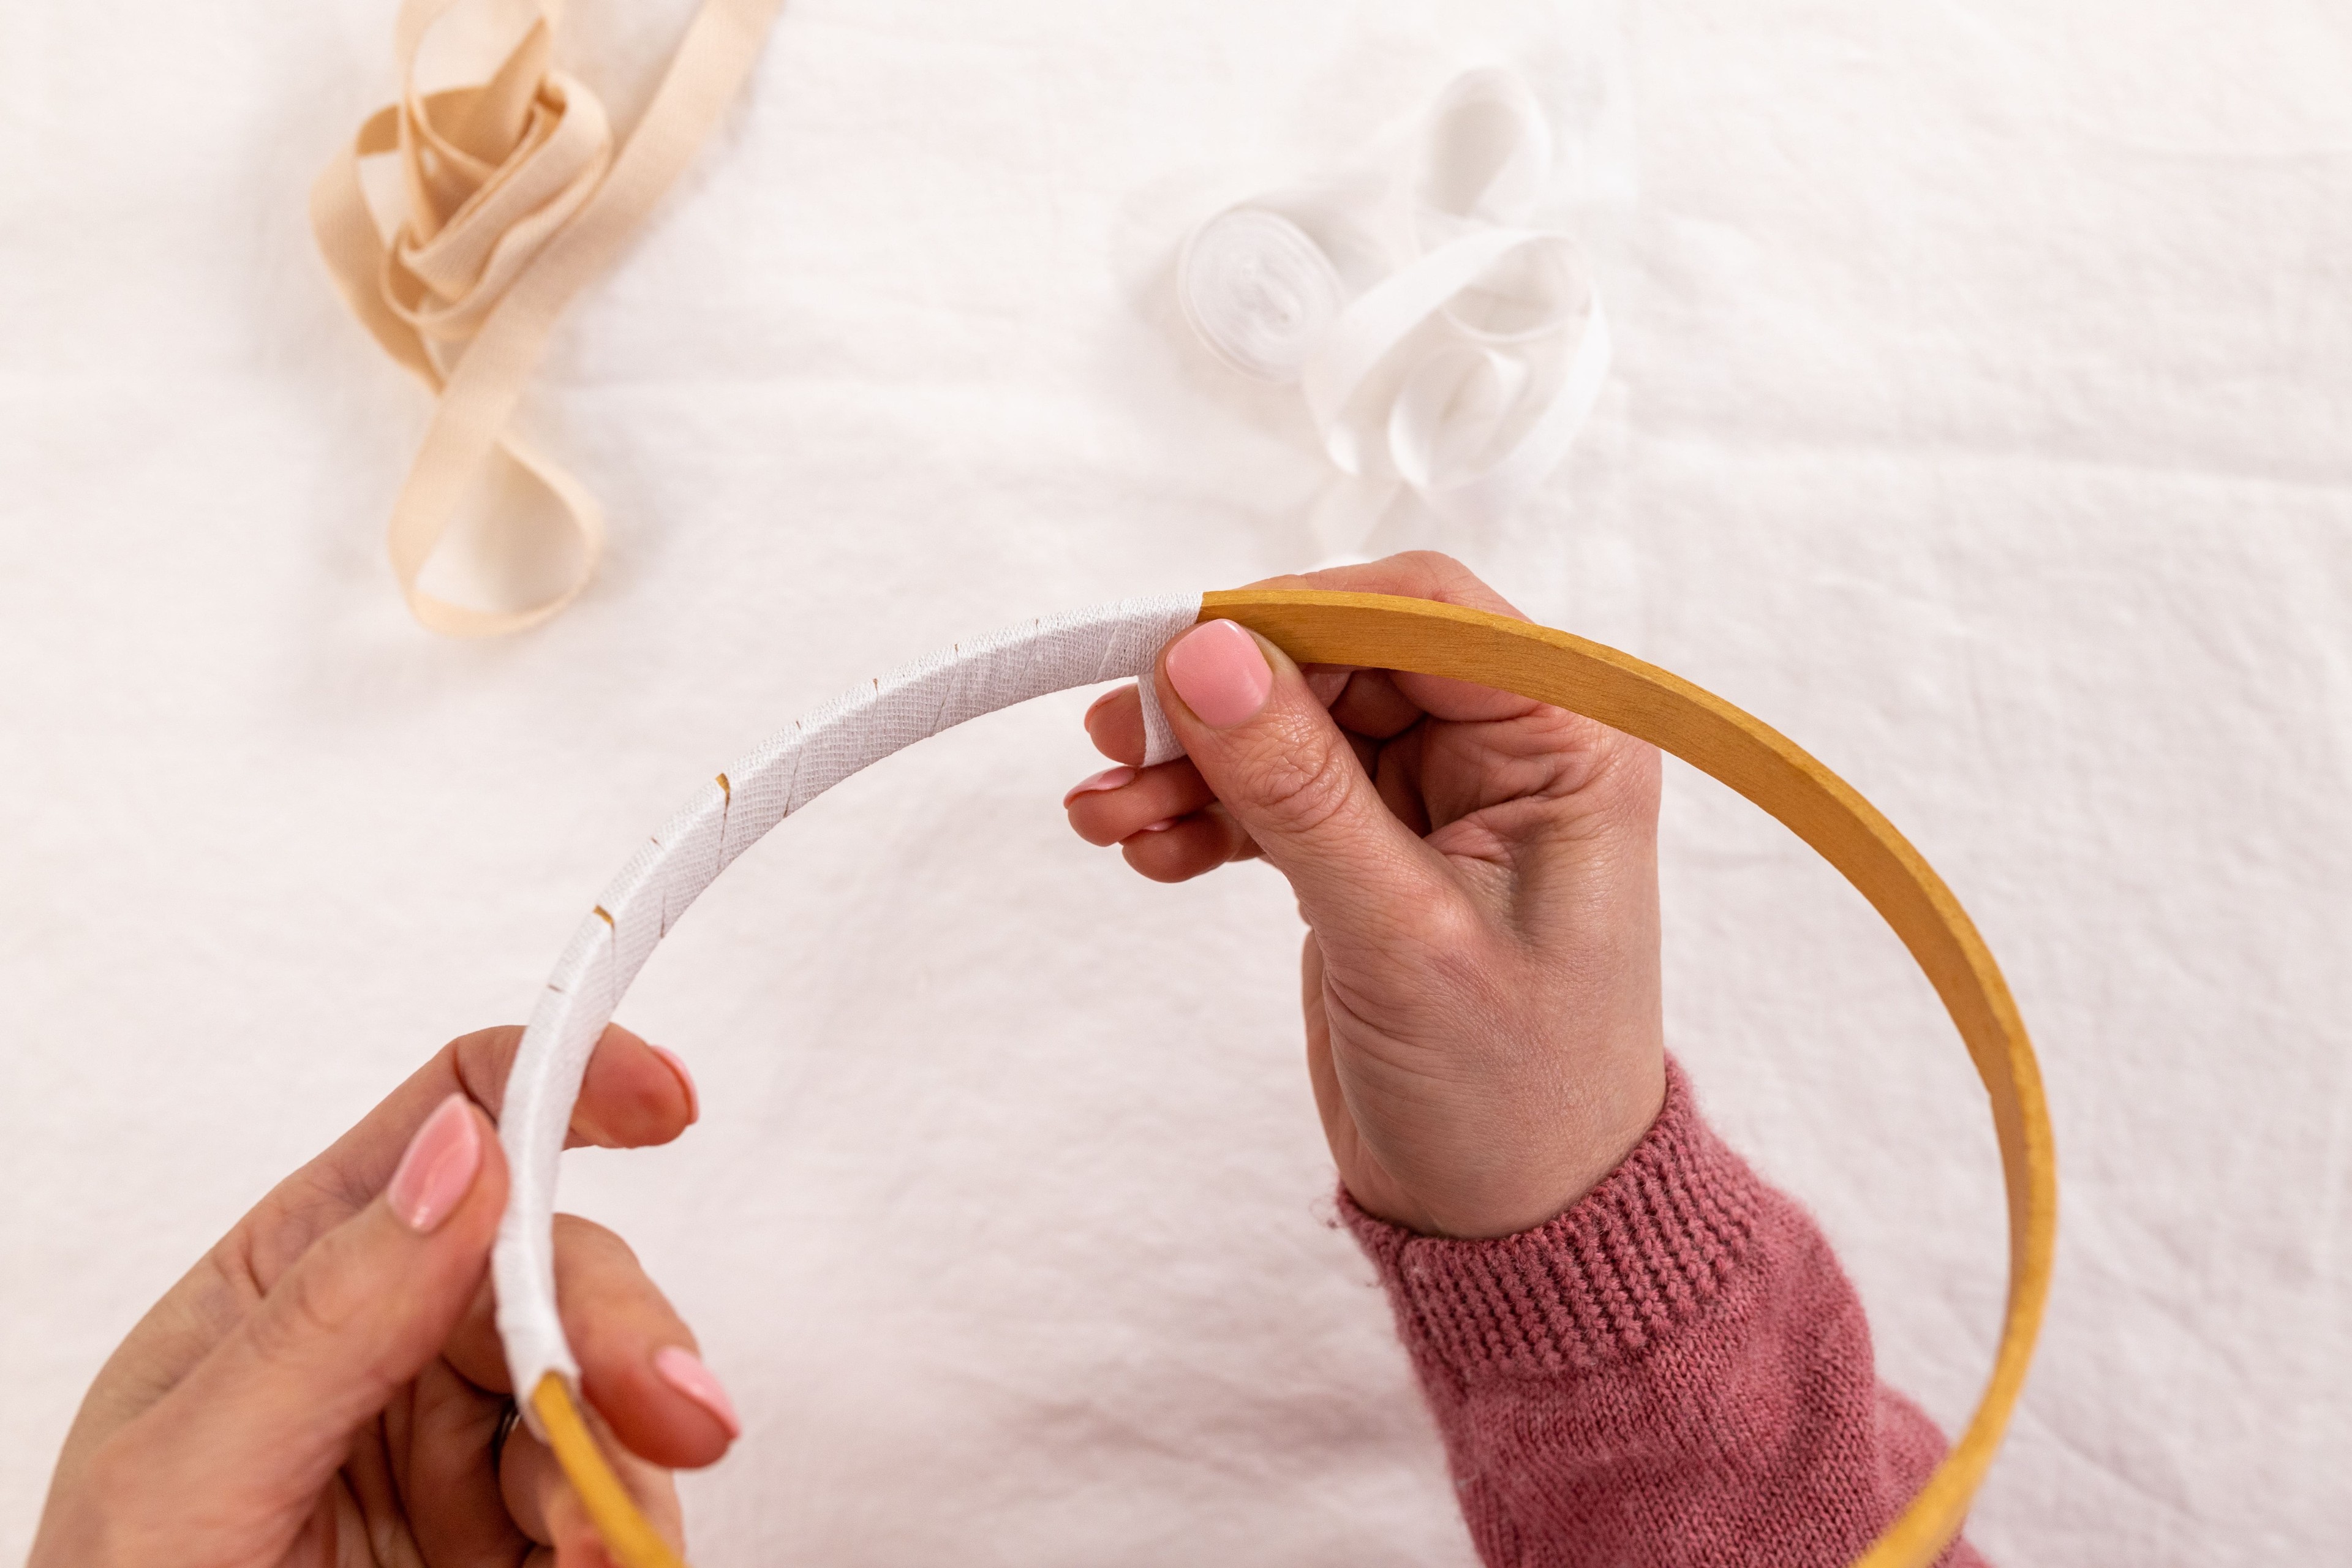
Now wind the tape around the hoop, at an angle. I overlap it a bit on the first wind around, so that the end of the tape is held down. But from then on, try not to have any overlap. It’s not a major if you do, but overall you’re trying to make a nice even effect without ridges, so zero overlap does work best.
Position the tape so that each time you wind it around, the tape lies right up nicely against the previous wind of tape.
Keep the tension tight, and if you find it gets loose, just rewind and redo that bit again. You might find it quite fiddly to move around the bundle of tape as you go, but it does get easier with practice.
Step 4.
Go right around and when you reach the start, overlap the end of the tape with the start of the tape a little bit. Trim off the excess so the end of the tape is on the inside edge as well. You’ll need to have nimble fingers to hold it tightly in place here. If one end unravels a bit, just rewind it tightly again.

Step 5.
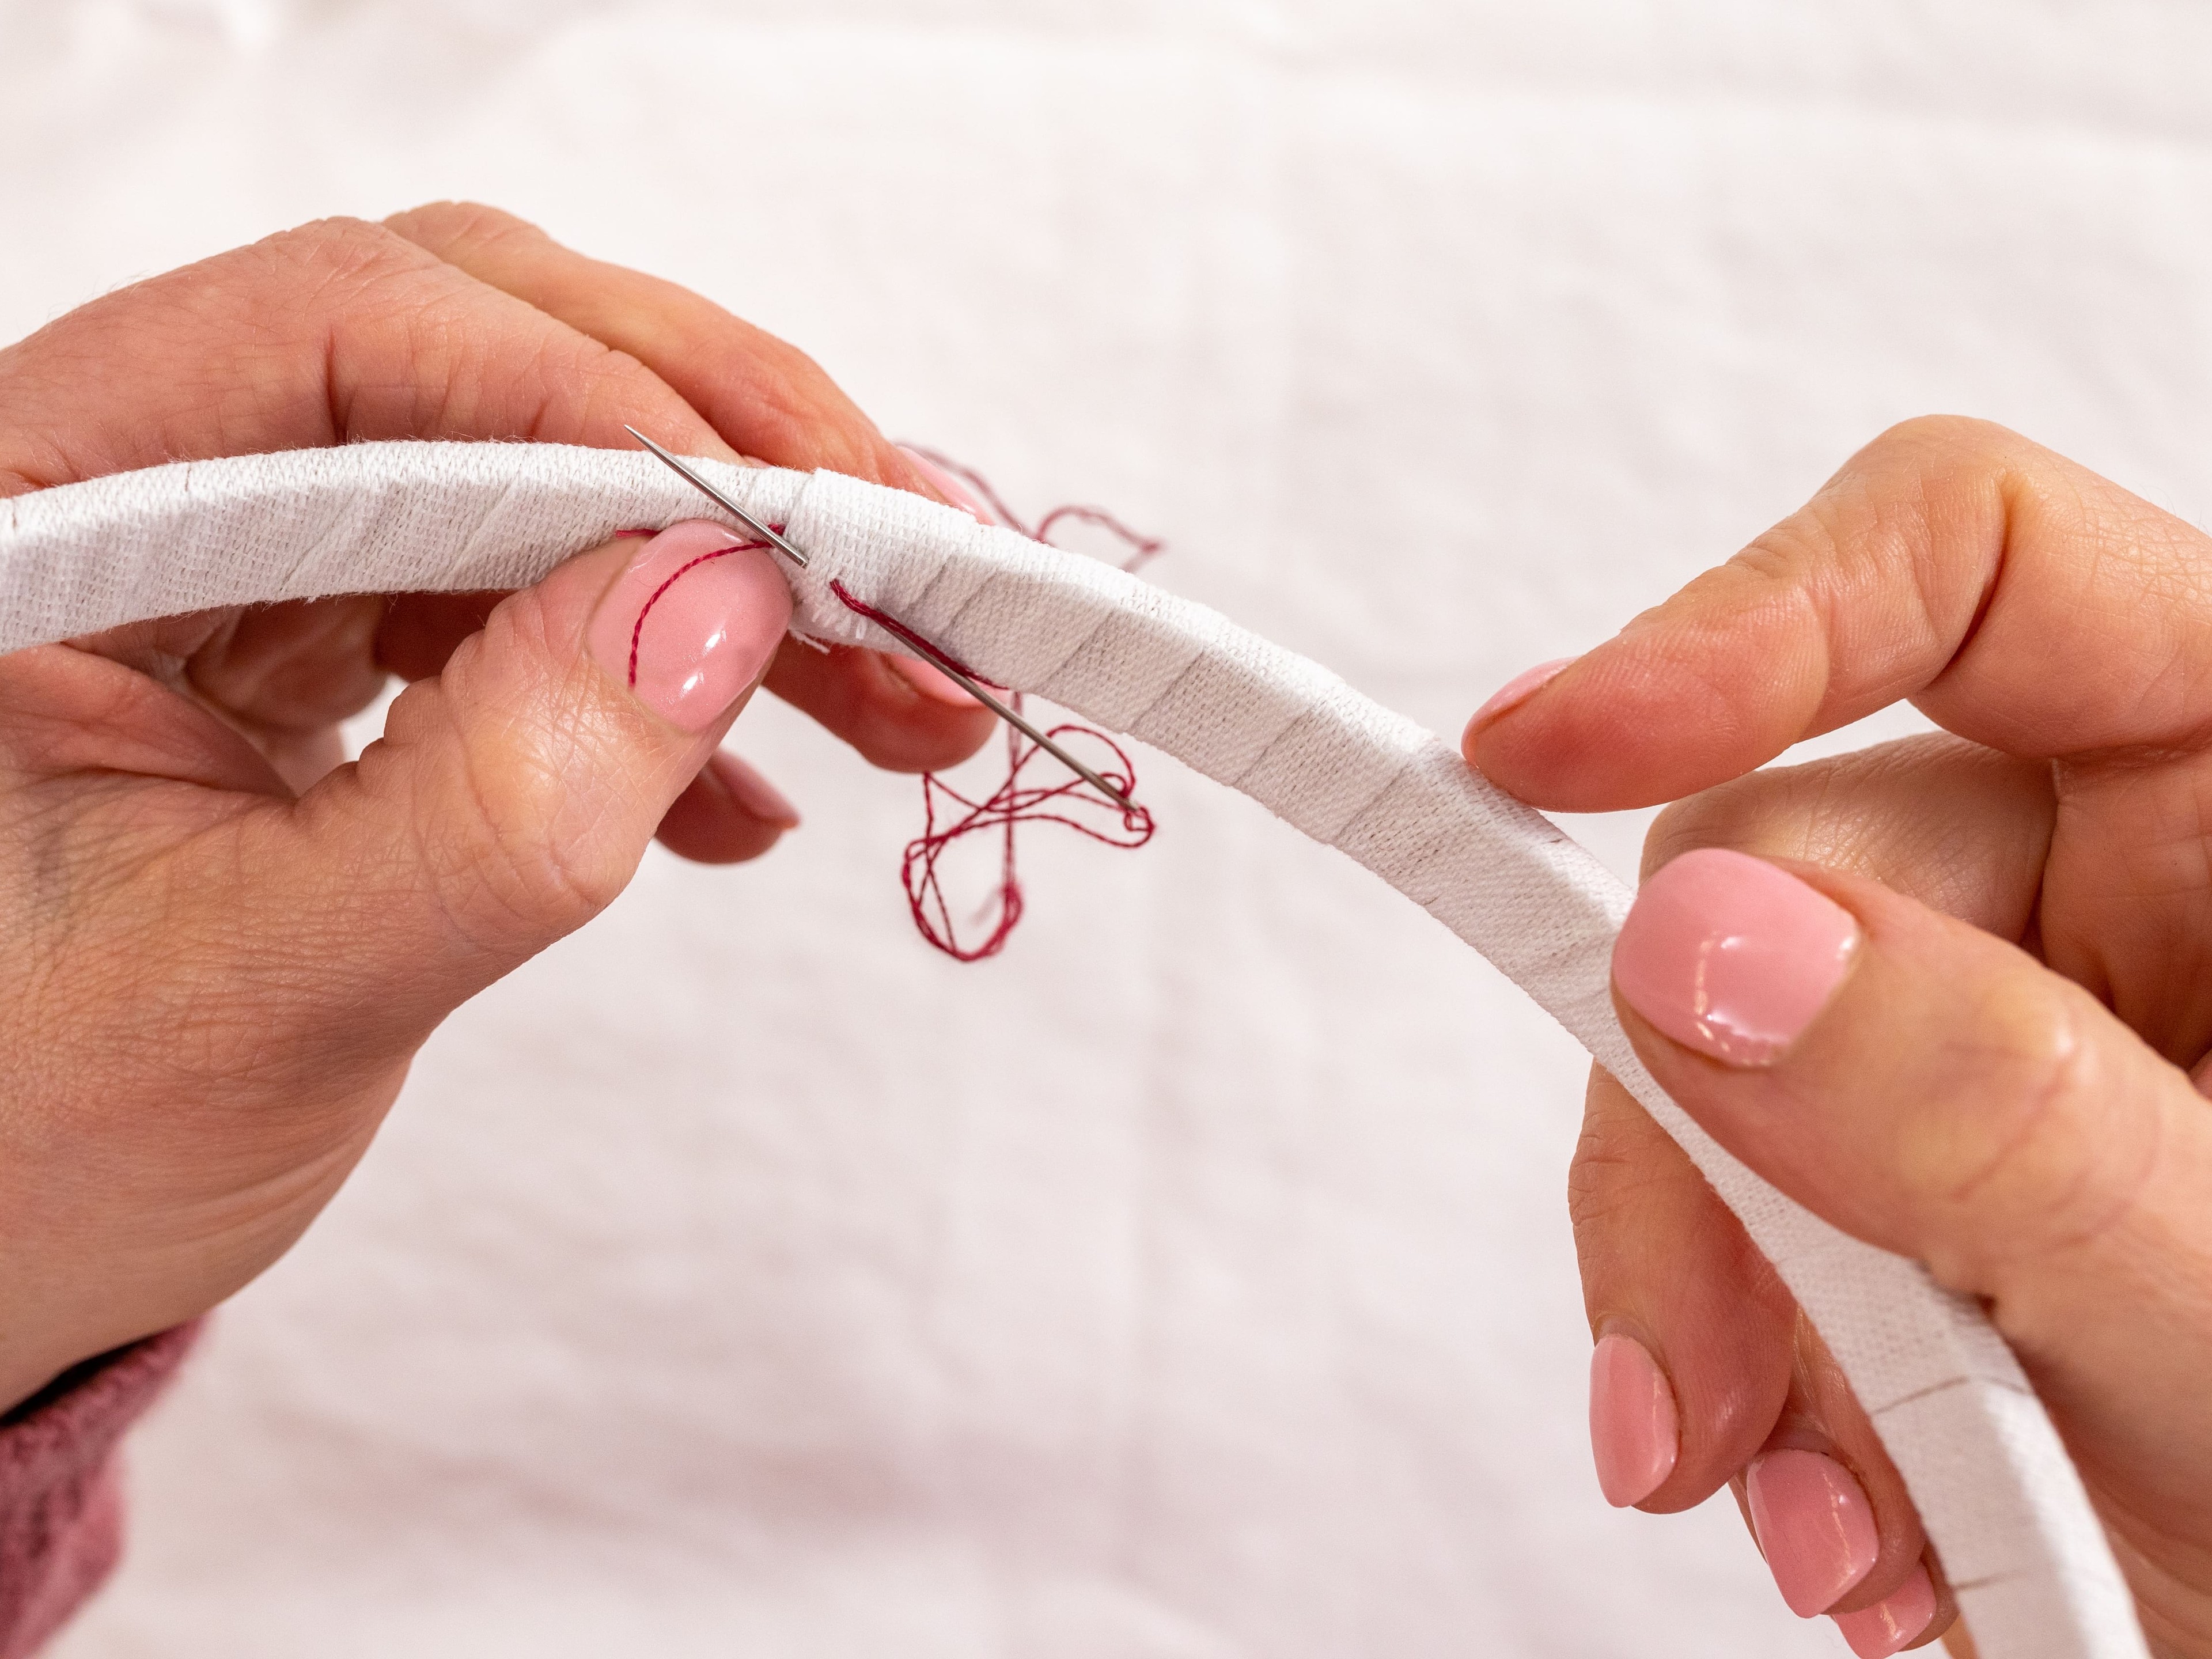
Now for the final step, use a needle and thread to stitch the tape in place – ideally on the inside edge. I knotted my thread off, then stitched down through both layers of tape, and up again. Keep doing as many stitches as you need, until it feels like the binding is securely held in place.Each time, make sure you are stitching right through both layers of tape beneath. Then knot off your thread to finish it, and trim any loose ends. You can knot it off by creating a loop as you stitch, poke your needle through the loop, then pull tight (I do this a couple of times).
Now you’re ready to dress your hoop. Because the inner hoop is now thicker, you might find the screw needs to be loosened a bit to get the hoop in, before you tighten it up.
Conclusion
And there we have it! I have a feeling that once you have added this step to your process, you won’t look back and will find modern embroidery even more enjoyable.
What's next?
Our beginner embroidery kits are a favourite among new stitchers for their simple, step-by-step instructions and beautiful designs that make learning easy and fun. Whether you’ve been wanting to learn embroidery or are just searching for your next creative hobby. These kits are the perfect introduction to embroidery.
Why people love our beginner kits:
-
Everything you need is included: fabric, thread, hoop, and more!
-
Clear instructions to guide you every step of the way.
-
Gorgeous designs you’ll be proud to display.
Our most popular beginner kits

